
Winterize Your Canine
by Ann Yowell, DVM
As winter sets in and the temperatures start to drop, your canine feels the difference just as you do. They will need a little more attention to stay warm, happy, healthy and safe during the winter season. Winterizing your canine can make a world of difference to both of you – it will help maintain his ability to do his job, thus keeping you both safe.
SHELTER
Adequate shelter is probably one of the most important things you can provide to your canine – it is a necessity. Some canines are kept indoors, so for them, this is not an issue.
All outdoor canines should have adequate shelter that provides them a warm, dry, draft free environment. If you keep your canine in a garage or a basement, they need to have protection from the floor, as tile and non-carpeted areas can be extremely cold. If they are in the garage, you need to monitor the temperature, as some garages get very cold. If the garage does get cold, you will have to provide enough warmth – such as putting a doghouse in the garage.
Canines that are kept outside will need a shelter, such as a doghouse. The shelter should be free from drafts, insulated, watertight and have plenty of clean, dry bedding. The floor of the shelter should be off the ground to help preserve warmth and to prevent moisture accumulation beneath the shelter. A plastic flap should cover the entrance to help prevent drafts. The shelter should be big enough for the canine to stand up, turn around in and lay down, but small enough to retain body heat. Use of plastic tarp and zip ties to block the wind on outside kennels.
Bedding is extremely important. I do not like the use of blankets or shavings for winter use. If the blankets get wet, they do not dry in the house and they cannot keep your canine warm. I recommend use of cedar or shavings on the floor of the shelter and then layering hay over the shavings in the interior of the shelter. I really like the use of hay in shelters. Yes, it is very messy but it is warm and that is what we are after-warmth. You can buy a bale of hay from a local feed store, or if you know a farmer, you can get one from them. Don’t get alfalfa; it isn’t very comfortable to sleep on. Use hay and not straw. Straw mats down too easily and doesn’t fluff up like hay does.
Even though hay is very messy, it will help wick moisture away from the canine if they are wet when they get into the shelter and it also has the tendency to dry quicker than blankets. The best thing about hay, you can virtually fill the shelter with it and they can burrow down in the hay and be cozy and warm. You would be surprised how warm they can stay in a hay stuffed shelter. As they beat the hay down, you can fluff it up again. I fluff my outdoor canine’s hay twice a day and it works well. When the hay gets beat down and you can’t fluff it well, just add more. With adequate shelter, a canine can withstand some cold temperatures-wind and wet are the biggest winter enemies, so keep them dry and out of the wind.
There are several types of flooring you can provide for an outdoor canine. Concrete can be easy to clean, but can quickly develop ice issues and is not forgiving, thus hard on their joints. Stall mats, such as those used in horse stalls, are easier on their joints and are easy to clean, but can have the same issues with ice as concrete and if your dog is a chewer, he can really do some damage to them. I have a natural dirt floor in my canine’s pen, but it is thickly layered with shavings with a heavy overlay of hay. It’s great for his joints, dries quickly when it gets wet and is inexpensive and easy to maintain. Supplemental heat sources such a heat lamps and portable heaters are very dangerous and not recommended for use.
HYPOTHERMIA
Hypothermia is lowering of the body temperature to less than 89.5 F. Hypothermia may occur during exposure to a cold and/or wet environment with inadequate shelter. When the body temperature lowers to 82 F or less, canines lose the ability to return their body temperature to normal, but with treatment they may survive. The extent of injuries to the body varies with the actual temperature of the body and the duration of the hypothermic condition.
- Animals may survive conditions of mild hypothermia (body temperatures of 86-90 F) for 24-36 hours.
- Animals do not survive after 4-24 hours of moderate hypothermia (72-77 F).
- The maximum survival time from severe hypothermia (less than 60 F) is 6 hours.
Signs of hypothermia vary depending on the core body temperature and the duration of the hypothermic state. Signs include:
- Body temperature less than 89.5 F
- Slowed heart rate
- Mental status varies from depression to unconsciousness
- Shivering
- Slow and shallow respiration
If your canine experiences any degree of hypothermia, wrap him in warm blankets, get him into a warm environment (such as your vehicle) and transport to a veterinarian immediately.
FROSTBITE
Frostbite can occur after exposure to a cold environment when the body temperature is below 93 F, following the freezing of any exposed body surface or contact with cold metal, glass or liquid. Exposure to cold causes destruction of the superficial tissues due to the disruption of blood flow through the small blood vessels.
- SIGNS OF FROSTBITE
- Acute
- Pale skin
- Skin is cool to touch
- Skin may be blue
- Affected body parts may lack feeling
- SEVERAL DAYS LATER
- The affected tissue may shrink
- Discoloration of the affected tissue
- WITH THAWING
- Chronic
- Affected skin is very red, painful & may be swollen
- TWENTY TO THIRTY DAYS LATER
- Hair loss in affected areas
- Sloughing of the dead tissue
If you suspect your canine is suffering from frostbite, remove him from the source of the cold, apply warm compresses to the affected area, immerse the affected area into warm (102-104 F) water, gently dry the area (never rub the affected area) and then transport to your veterinarian. Be extremely careful when you have your dog around any bodies of water, as they can be a potential death trap in the winter.
FOOD AND WATER
Canines that stay outdoors or are working will need additional calories during the winter. Some canines can require up to 25 percent more calories in the winter. Discuss your canine’s dietary requirements with your veterinarian. Providing them with a warm meal is easy to do – just add some warm water to their regular meal and see how much they appreciate it.
I am a strong supporter of the use of stainless steel food and water bowls, but during the cold weather, I recommend plastic bowls. When the temperatures are low, your canine’s tongue can actually stick to the metal and freeze. Provide plenty of fresh water. Canines are just as prone to dehydration in the winter as the summer. You will need to check and/or change the water several times a day to ensure that your canine’s water isn’t frozen. Snow is not a satisfactory substitute for water.
TOXINS
Antifreeze often collects on driveways and roadways and is highly poisonous. It smells good and is sweet tasting to the canine and they will readily drink it. If you know or suspect your canine has ingested any antifreeze, even just a few drops, immediately take him to your veterinarian as any delay in treatment can prove to be fatal.
Salt and other de-icing chemicals ingested in large amounts can be fatal – salt will be discussed more in depth in the paw care section.
GROOMING AND PAW CARE
Groom your canine regularly. Animals often have dry skin in the winter and brushing helps stimulate the production of oil from the skin glands. Brushing not only stimulates natural oil production, it removes irritating debris, stimulates the skin by removing dead skin cells and encourages blood flow to the skin. It also keeps the fur from matting down. Matted fur prevents the body from having its own natural insulation, thus the canine can’t stay as warm if his hair is matted.
Frozen ground has no give to it; nothing to lessen the shock of impact with each step a canine takes. Icy, uneven surfaces can slash the dog’s paw pads. Cuts to the pads fall into two categories: slicing wounds and horizontal cuts. Slicing wounds drive upward into the pad causing it to split into two pieces. Horizontal cuts lift part or the entire pad away from the main body of the toe. Both of these types of cuts are painful and should be checked by your veterinarian.
On any frozen surface where there is little or no vegetation, stones or sharp objects that the paw may strike will not sink into the soil as the canine’s paw lands. If a canine’s nail strikes an immovable stone set in icy ground, the nail may bend, break, shred, or even worse, it could cause a dislocation of one or more of the toe joints. Another danger of a canine working on frozen ground is if the canine slips and tries to regain its balance at speed. Muscles, tendons and ligaments can be easily injured. An injury may not show up at the time it occurs as a canine can be running on adrenaline, with the injury only becoming obvious the next day.
Keep their nails trimmed. Most working canines keep their nails short just due to their job. Sometimes, the nails will grow longer in the winter because they are not working as much. Long nails will make your canine’s toes spread when he walks, thus giving more room for snow and ice to build up between his toes. Long nails also affect your dog’s weight distribution, shifting his weight onto the back of his paws. This means he will have less traction and be more likely to slip and injure himself when he is working.
Keep the extra hair on the bottom of their paws and in between their toes trimmed. This will help prevent buildup of snow and slush between their toes. Slushy snow tends to stick to dog hair and salt and grit may be mixed in with the slush. Compacted snow, grit and salt on the bottom of their paws will make it more difficult for them to walk, run and stay on their feet. Try not to pull packed snow from between your canine’s paw pads, as this can be painful. Warm the paws before you remove the packed snow.
Salt and de-icers, which are primarily made from rock salt, can cause your canine’s pads to dry out and crack. Snow, grit and de-icing products can accumulate in these cracks and contribute to blisters, sore pads and infections. You can apply a thin coat of petroleum jelly to the paws daily to help prevent them from drying out and keep them supple.
Washing your canine’s paws after tracking or being in snowy or icy conditions can be a little troublesome but serves several purposes – it will warm his paws up, it will dissolve any ice that has formed between his toes and if there are any de-icing chemicals or salt on the paws, it will remove them.
Dog boots can also be a good investment. Many dogs tolerate them well. They will protect their paws from salt, de-icing chemicals, grit, snow impaction, superficial abrasions and they also help retain body heat. One of the ways a dog loses body heat is through his paws as they come into contact with cold, frozen ground. When your canine gets back into your vehicle, always wipe his underbelly, legs and paws off with a towel.
A little extra effort on the handler’s part to provide their canine with proper grooming, adequate shelter, adequate nutrition and the monitoring for adverse conditions can make a cold winter season easy to compensate for and allow the canine to continue to perform at his best.
Training Your Dog To Trail
Let us begin to explore the process of teaching a dog to follow the trail of a man with an open mind; and to realize that there are many theories as to how to train your dog. I would have to say that I have seen many different theories presented to Handlers over the years. Some are good and some were not good. If I were to summarize a short synopsis of training a dog. I would say, find the right dog, be patient and never lose your temper.
Tracking is one of the most difficult lesson to teach a new Handler. The process is really quite simple, but lengthy and must be done in Increments, so that the dog learns his basic lessons properly.
SCENT SURE DOG:
Through the process explained in this article, our end result is a dog that you can rely on to find an unknown trail in an open field and consistently follow it with confidence. Including a heads up indication when there is no trail available or when the dog has over shot a 90 degree turn. A scent sure dog can be cast along a roadway to locate or recover the trail of a suspect or lost child. I remember in my early days as a Police Officer, when we use to say things like, “Well, I am a City Police Officer, I don’t need to teach my dog to track in the woods”. And the County Officer would say, “Well, I am a County Officer, I don’t need to teach my dog to track in the City”. I did not understand that city or hard pavement tracking is the most difficult training. It is the last place the doge goes in his training. A dog must learn to trail in a straight line on grass before we go into turns.
I also begin training in areas where there are few distractions, such as, people or other animals. The dog will always want to investigate animals or people either by the odor on the ground or visual distractions of people, cars, etc. Noise is another distraction that you want to say away from when teaching the dog his first lessons. It’s hard to get a dog to follow a trail when he’s more interested in the distractions.
A few definitions are needed before we go too far into our training.
- TRACK – To follow a man footstep to footstep. According to ground Disturbance, along with individual odors absorbed by the ground.
- TRAILING – To follow a man according to scent that has fallen to the ground according to the wind conditions.
- NEGATIVE – A noticeable change in the dog when he has come off the trail.
- 1. Head comes up
- 2. Leash goes slack
- 3. Tail change, etc.
- QUARRY – Subject being hunted, prey.
There is a lot of difference between the two definitions of tracking and trailing. When a man walks over grass, he crushes it. Which in turn causes the blades of grass to secrete a liquid, which after a short time period causes an odor for the dog follow. Individual odors, such as, shoe polish and other human odors, are also absorbed by the ground from the man. The dog will be far more exact on following the footsteps of man, they will also be much slower.
A trailing dog follows skin particles (called Rafts), which fall off the man and into the air. They are continuous and too small to be seen by man. They actually come from the outer layer of skin called the Epidermis Skin Layer. It is the air current, which determines where these small particles of skin fall to the ground. If you have wind, the skin particles will land on the ground some distance away from the actual footsteps.
I will not go any deeper with scent in this tracking article. But I will say this, every Handler must understand the fundamentals of scent. If you have not been through a scent class, you will lose a lot of bad guys, because you did not understand signals or lack of signals from your dog, that you could learn in about a two hour scent class. When starting the first tracking lesson, I first acquire a proper fitting tracking harness. A tracking harness is important because it distributes the weight and pull across the dogs’ body and not his neck. The dog’s head and neck need to be free to move so he can sniff the ground freely to follow the trail or track. Think about it. If a 200 pound man has a line attached to the dogs’ neck, and the dog is using his neck to pull. The dog cannot sniff the ground. I recommend a good leather harness, nylon is OK. I DO NOT agree with tying the dog’s head down. My friends, this is not the way to go. You cannot force a dog to track. There are lessons the dog will not learn if his head is tied down. The process of training a dog to track begins with teaching him what great fun he can have. He should b rewarded at the end of the track. The dog’s head must be free to move up and down and side to side so that he can follow the scent.
MOTIVATORS:
This is a term that I use to increase the desire for the dog to trail and learn. It is a communicator that the dog understands. Not every dog will begin to trail for the scent of man. But most will follow the scent of food. I know this will probably blow the mind of a few people and the first thing they will say is, “I don’t want my dog to pick up food on the track”. But it is a good motivator and the food will be removed from the trail in a short time. Once he has learned to follow odor on the ground to get his reward. I have communicated to him to sniff the ground for scent, now I can simply replace the odor with human scent. When I use food, such as a hot dog, I am always careful to have the track layer (or Quarry), rub it onto his boot and not drop pieces of the hot dog onto the ground. I just want the odor. If you drop food pieces, the dog will sniff out and eat the food. We do not want that. We just want him to follow the odor to the man who will give him the piece of hot dog at the end of the track. In a few lessons, the hot dog is going to be taken out of the picture entirely. We have communicated to the dog, with the aid of food, what we wanted him to do.
The motivator is determined by the dog’s desire, or lack of understanding of what I wish him to do. In essence, what will it take to get him to work for me? A few things I call motivators are:
- Human Scent
- Food
- Ball
- Praise
- Bite at the end of track
TEMPER:
losing your temper at your dog will set you back weeks in your training. So, do not get upset. You want your lessons to be positive, positive, positive. My first lesson on tracking will be to find a field with grass anywhere from 3″ to 8″ in height. The Handler places the harness on the dog and holding the dog at close proximity to himself. The Quarry usually holds the ball and gets his attention by talking to him. Showing the dog the ball and walk backwards, laying a short track by dragging his feet over the grass. I usually go about 25 feet and lay the ball down, placing some grass over the ball, so the dog cannot see the ball until he’s almost on top of it. But it is important that the ball is somewhat visible or the dog may start to search for it by circling at the end of his first track, we do not want that. So do not make the track too difficult in the beginning.
Also, you want to be sure that the dog cannot see the ball from where he is or he will simply go straight to the ball without trailing. I like about 3 tracks per lesson and then quit. Remember not too hard and do not try to advance to difficult tracks too fast. I add about 10′ to 15′ at a time to be sure he understands each lesson before advancing to more difficult lessons. Always be sure to lay your track with the wind going away from your dog. Never train trailing or tracking into the wind. Your dog will learn that with his head up, he can smell the scent of his Quarry much easier than sniffing the ground.
Once he learns that he can air scent and find the man, it is almost impossible to get him to put his nose back onto the ground. Or at the very least, it will take a strong motivator on the ground to get him going again. So lets do it right the first time. Remember that terrain and height of grass is important. If you train in areas of high vegetation, the scent of the Quarry will be high on the vegetation. This will cause the dog to trail with a high nose. Use lower cut grass for the initial training. Never correct your dog with the leash while tracking. One day you will be in a wooded area and the leash will get wrapped around a tree. The dog will interpret this as a correction and he may come off the track and away goes the bad guy. So absolutely, NO line corrections. If you must correct your dog, simply command him to “Leave It”.
CASTING:
Sometime after the first few lessons of trailing. I will begin to have the Handler cast the dog a few feet away from the trail. I will do this to teach the dog to give a physical indicator that he has found the scent. This simply means that the Handler can tell when his dog has found the scent. You can see the dog pay attention to the outgoing trail. Again, once you start this, the Handler must know exactly where the beginning of the trail is. We usually kick a straight line for a foot or two into the grass. 1′ from the direction we cane and 1′ towards the new direction. This does two things, it is a physical marker for the Handler to see and second, it lays down a hot spot for the dog to sniff. It makes it easier for the dog. The Handler always casts his dog from left to right of the outgoing trail. Starting lessons with just a foot or two away from the trail and eventually working up to over twenty feet away from the trail. Casting your dog in this manner will cause the dog to be “Scent Sure”.
Think about it, if you always cast your dog in the same direction of the trail. What happens when the track is 20, 30 or 50 feet away from where you were told the trail started? When you cast your dog into a field, you tell him to “Track”. Most dogs are going to go strong in a straight line. They are going to look for a trail, if there isn’t one right there, he is going to find one. When I speak of the dog giving a negative. I simply mean that there is a noticeable change in the dog’s body movement. The problem is this, the Handler has never learned to read a negative. And just as important, the dog was never taught to give a negative. So the team goes a quarter mile and then all of a sudden the dog stops. Because there never was a trail.
He was just trying to please his Master and track or try to find a track. The Handler calls out on the radio, “Well, I had a track but lost it”. In reality, he was never on the track. Had he taught his dog to cast properly and give an indication, he could have easily found the trail.
WHY TRAIN THE CORNER:
The process of training the 90 degree turn is also a main lesson acquiring a scent sure dog. It is through the process of teaching the dog to make a 360 degree circle when he overshoots his turn or runs out of the odor so to speak, that causes him to go into the circling process looking for the odor. The Handler learns the body language of his dog when he overshoots a turn and is no longer following scent. Most dogs with time and practice will simply raise their head, the leash will go slack and the Handler begins to circle the dog slowly backwards until he has recovered the out going trail. When the dog sniffs the trail, his head goes down, the leash gets tight from the pull of the dog and away you go.
TRAINING THE CORNER:
I use a large field for the beginning of corner work. The Handler can see exactly where the trail is laid, and so can I. This ensures that the scent is on the ground. Remember grass no higher than 6″ to 8″. We want the dogs nose down.
We start with 30 degree angles, right or left, from the straight trail. The angled trail does not need to go far, maybe 20′ to 30′. Because on short trails, I will usually leave a ball at the end of the trail. Have the Quarry lay the trail and then return by walking back the incoming trail. A man would be easily seen in the field by the dog and he will go to him by sight versus using his nose to trail. When the dog proficiently makes the angled turn, then increase to a 45 degree turn. I use flags to mark the corners, the Handler must know where each corner is. As the dog follows the straight trail, he may pass the corner, he is allowed to go past the corner but the Handler will not. He will stop on the corner and begin to recast the dog in a circling effect over the corner. When the dog passes over the turn, he should go with the trail. Be sure to give him a short praise for making the turn. Sometimes the initial circling is not pretty and the Handler will have to guide the dog in a circle because the dog has never circled and does not know what you expect. This corner work takes time, the dog does not learn this quickly. I have taken weeks to get a dog proficient at corner work.
REMOVING THE KNOWN TRAIL FROM HANDLER SIGHT:
I usually do corner work with a box type trail. Making 2 or 3, 90 degree turns. With each leg of the track 50′ or so. You can arrange the box with left or right turns. It does not always have to be a square. The Handler must be confident in his dog prior to removing the flags out of the corners. Then I will make him attempt only 1 unknown corner per trail. So out of 3 turns, only 1 turn will not be marked. Usually the first turn is not marked. This gives the Handler time to get comfortable with reading his dog. As the team gets proficient, you can remove flags off the corners and increase the distance of each leg of the trail before adding turns.
GOING HOME IN TRAINING:
I have a saying in training, always return home with the dog in training. This simply means that if there is a little frustration from corner work, go back and lay some simple straight leg trails for the team. Just as a team starts into advanced tracking, I will occasionally go back into the field and lay some box tracks for them. They are proficient at this and it’s on a good surface. It reinforces their training and its fun for them. So keep the fun in training.
LINE HANDLING:
I use a 10′ leash in training, its not too long. The Handler doesn’t get wrapped up in it and it puts a little distance between him and the dog. The Handler must keep the distance of the leash between him and the dog. If he gets too close to the dog, it can cause him to get a little nervous and the dog may prematurely speed up. Kind of like, you run and I run a little faster game between the dog and Handler. The Handler has a tendency to go left or right of the dog and can unknowingly guide his dog off the trail. The Handler must align the dog’s tail to the center of his body and stay there. If the dog goes left or right, then the Handler adjusts his position, keeping the dog’s tail aligned to the center of his body.
It is important that the Handler not drag the dog too hard. This is a nervous tension by the Handler to do this, he must allow the dog to move freely from left to right to stay with the scent. As time goes on the dog will get better and better at working the scent. Too many times we have outsmarted ourselves by trying to restrict the dog’s movement. We have done this because we were afraid our dogs would lose the scent in training, this is a nervous reaction by the Handler. In reality we have short changed our dog’s training because we did not allow him to make mistakes.
If a dog comes off the trail, then help him get back onto it and praise him when he does. If the dog consistently loses the trail, then back up your training to shorter, straight track. Remember one step at a time. You want the dog to learn each step completely before going on to the next.
TALKING:
Do not talk too much, this is a distraction to the dog. He cannot listen to you and concentrate on following a trail. I recommend a “Good Boy” when he casts off on the trail or after making a turn, but otherwise I am quiet. Eventually as time goes on, I will expose the dog to longer trails with a combination of turns in the trail. I will set the trails to different types of terrain, such as hills, creeks, etc. The dog still has to learn all these types of areas that he is going to work in.
This is the beginning of teaching your dog to trail. There is advanced trailing that I will not go into in this article. If you have any questions, feel free to call me and I will be glad to help you.
Patrick T. Merritt, Vice-President
American Police Canine Association
Trailing & Terrain
Over the years I have learned that the ground on which I have trained my dogs is more important than I first realized. During training, it is essential that you select terrain carefully, regardless of the dog’s level of experience, ranging from the green dog to the advanced level dog. A second vital factor is the wind conditions in which your terrain will be affected by. Ninety (90) percent of your training will be conducted with the wind at the handlers back. Dogs will be dogs in which they will exhibit behaviors such as following rabbits, deer, and other dogs. Through a step-by-step process, we will train the dog to pay less attention to these distractions.
A dog learns to “flush” as a puppy by watching his mother and other members of the pack. The dog will never gain the ability to trail in the wild that we will introduce to him as a police service dog. In order to do this, we have to set our training areas so as to avoid these initial problems, which I have mentioned. Our goal is to have the dog focus on the trail before him. My preference as a trainer is to start the beginning dog in a grass terrain, consisting of a height of four (4) to six (6) inches, a medium height. In addition, I also want my terrain to be level. This terrain condition will assist the dog in putting his nose down, without impairing his ability to find odor. A second point is that there are few times that you are going to train in high grass. However, one of these times will be after the dog is proficient in low and medium grass height conditions. This high grass training will be for the experience of following odor in this setting. High grass forces the dog to place his nose high and will erase his training to place his nose to the ground. High grass is easier for the dog to follow as the scent is located higher off the ground. The dog does not have to work as hard to find odor, which he will prefer. This type training is done when the dog is proficient in low grass and has learned how to trail. Bad guys don’t care where their trails lead. We must introduce all of these areas I have discussed to the dog and in a regimented and timely basis.
Later I will make a transition from medium height to low grass. Low grass causes the dog to place his nose closer to the ground and work harder on gaining the odor. The dog will use his experience learned in medium grass terrains to work the lower grass heights. It is important to note than when making the transition to lower grass, the dog will not be as proficient in following odor initially. Be patient and work straight leg tracks until the dog begins to get the idea of what you are trying to teach him. Once his “light bulb” turns on, you can then progressively move into ninety (90) degree turns. Short grass will perfect the dog and prepare him for advanced training terrains consisting of dirt, gravel and hard pavement.
Wooded areas must be introduced to the dog later in the trailing process. These areas are introduced after the dog has learned to trail on grass terrains and not before. Following a trail in the woods is just as important in the training as following an odor in a field. In wood terrains, the scent is high and better contained due to the foliage and surrounding trees. This environment can be more difficult for your training because of the numerous distractions such as hills, creeks, animals and people. The dog needs these distractions, but not until the dog understands trailing in the field. In reality, training in wooded areas is distraction training. Dogs may exhibit problems in trailing in these areas, because of the distractions which exist and not because that the scent is more difficult to follow.
Terrains composed of dirt and gravel can be introduced to the dog in the early stages of training, usually after he has learned to follow a straight trail. Introducing a road crossing a dirt or gravel path, which may be found in a field such as an access road, is the next step. A straight leg trail can be layed across an access road. The dog sees the dirt or gravel the first few times in which it does not have to work very hard in crossing the road and into the grass. However, you do have to insert t his into his tracking picture and build onto it when you believe the dog is ready to do this. Over time, you will be able to run longer and longer trails down a dirt or gravel road.
The word “Pavement” is a bad word for too many handlers. Why? Because it has presented difficulty for them to train their dogs and be proficient in doing. In order to succeed and be good in “Pavement” tracking, you must understand three points, which are; Point One, The time at which you introduce this type of terrain to your dog. Point two, How you introduce it. Point three, Consistency in your training.
Most handlers will attempt to train on hard pavement for a short period and then become discouraged because of the difficulty they experience with it. Understanding the theory of scent will help overcome this frustration. Scent lies on a road for a short period of time, depending on the time of day and weather conditions at that particular time. Scent on a roadway is very difficult to follow and therefore should not be introduced to the dog until it has a good foundation in his trailing abilities.
Following odor on pavement takes not only training, but also experience. The dog only gets this experience through following odor both on the street and in training. It is important to introduce road crossings and short easy trails along the roadway and work your way into the hard pavement process. Do not expect your dog to pick up on this as though it were grass. Most handlers approach and expect hard pavement to go the same way in which grass and wooded areas were learned. This is there downfall. A dog usually has three, four or five years of experience before he can “get with the program” with hard pavement training, and only if the handler continues to be patient and work hard pavement with the dog both on the street and in training.
Patrick T. Merritt, Vice-President
American Police Canine Association
Know Your Tactical Limitations
Sometime ago while working a detail I jotted down this article. Although at the time I was not completely satisfied with its content, I now feel that it is very applicable and worth considerable contemplation. Have you ever taken the time to face up to your pre-operational limitations before you deploy your canine partner into a situation to “just see” what s/he will do. Or, allowed colleague peer pressure to compel you into placing your canine into conditions that permits him/her to trot right into the eyes of a death sentence. When you are called to assist with a high level tactical incident on the street, you must be able to honestly weigh the probability of your canines’ capacity to resolve the situation against your own training limitations. Without taking the time to consider the consequences of failure you could very well jeopardize the safety of your canine, other officers at the scene, innocent bystanders, or put your departments’ financial deep pocket on the line.>
When we initially go through basic training with our new canine partners much of the focus is devoted to fundamental obedience, scent, and control work. Furthermore, most of the training scenarios are scripted so the canine always wins; likewise allowing the team to build confidence in their basic skills. Very little is concentrated on advanced tactical work for a number of reasons including, training time restraints, equipment availability, manpower, or departmental budgetary funding. In essence, this gives the handler a false sense of security in the teams’ capabilities to handle any, and all, situations once he/she is own their own. Trust me, I have been there; things have not changed that much from when I intended my first basic canine class. Don’t get me wrong, what you learn in basic training is essential to your success as a canine team, however never place yourself, or your canine; into an uncharted situation that you have not prepared for, this could be a recipe for disaster.
For instance, a neighboring agency calls for a mutual aid assist with your canine partner. Upon arrival, you are advised that an intoxicated male subject is walking in the area, or barricaded, making threats to harm himself or hostages if approached by officers. Although officers at the scene have the distressed individual contained and have now began to negotiate, on scene supervisors are requesting that you utilize your canine partner to bring an end to this volatile situation. At this point, I hope your first thoughts are contemplating if this situation truly is a canine mission, or at least, giving consideration to the fact that it may not be a canine task, as of yet.
Next, you must ask yourself:
- How will my partner respond to this agitated individual when actual physical engagement is made?
- Can my canine approach the subject swiftly and stealth enough without giving away his/her tactical advantage?
- Will s/he maintain focus and remain in the fight if the aggressor takes aggressive physical action against him/her?
- How will my canine work if back-up officers approach to assist or chemical munitions are deployed?
- Or most importantly, will my canine be able to remain focused on the task at hand in the company of gunfire if less-lethal munitions or lethal force is necessary?
- Although this situation is hypothetical, without being confidently prepared for a high-risk street situation, too many unknowns may very well surface.
To prepare your canine to perform under stressful conditions, you must first dissect the “what ifs” of as many realistic situations as possible in training and introduce different elements that may create distractions. Such as, introduce your partner to tactical obedience and control work on different surfaces, within different environments, under different situations, or while working in a team situation. This will foster handler control at a higher level plus allow the canine to maintain focus without being effected by the distractions that s/he may encounter while performing synchronized team movement or squaring off with an aggressive assailant. You should also continually familiarize your canine partner into different disciplines that may be utilized under tactical conditions, such as chemical or smoke environments, gas mask training, distraction devices, and tactical firearms drills just to name a few. However, you must always remember to work into each discipline, one step at a time, or you will undoubtedly drive your canine into crisis (fight or flight) or confusion; likewise doing more harm than good.
For example, working under stressful conditions while wearing a gas mask can be very unfamiliar territory for your canine, not only for the visual aspect but also the change in the handlers’ voice when verbal commands are given. To work into this area you should first allow the canine to be acclimated into mask use while practicing low stress obedience;likewise allowing the canine the opportunity to become accustomed to the handler wearing the mask and hearing verbal commands through a muffled tone of voice. Through repetitive training the canine will spend less focus on the chemical mask and more focus on the task that necessitates its use. After the canine is comfortable functioning while a mask is being utilized, s/he will next be ready to slowly work into a gas, or simulated gas, environment. As I said earlier, you must dissect each task or environment if you do not want to bring about a negative reaction from your canine under a stressful situation.
While on the topic of conditions that may alter the handlers’ voice, I would like to touch on how giving verbal commands, under stress, can also affect your canines’ behavior if you do not plan and prepare. Throughout basic training I am sure that everyone has heard their trainer explaining, over and over, the “do’s and don’ts” of voice inflection and modulation when giving commands to his/her canine. However, no one can dispute the fact that this has been challenged by every handler who panicked on occasion, for one reason or another, during a training scenario. Case in point, when the “out” or “release” command is given during control work and your canine refuses to cooperate off of a bite suit or agitation sleeve during control work. Likewise, creating an unintentional situation where you responded with countless, high-pitched commands in an attempt to gain canine compliance.
- When this occurred, how did the canine react?
- Did s/he forget you existed and stayed on task of bite and hold?
- Did s/he seem confused with your loud multiple commands or appear to be telegraphing on the bite while keeping you in view?
- How did you respond?
- Did your voice become louder, or elevate in tone?
- Did you repeat, or add commands, that had no relevance to the original verbal request?
- Or, after this had no affect, how did your canine react when s/he saw you heading his/her way for the purpose of initiating a compulsive correction to gain control?
- Did s/he immediately release and obey, or did s/he maneuver his/her position to keep the decoy between you and himself/herself to narrow the possibility of physical compliance?
- So, after considering these common slip-ups in training, what happens on the street when you get excited and your voice becomes louder and elevated due to the exhilaration of the real-life situation?
- Does your canine adjust and bring a picture perfect end to the situation as planned?
- Or, does s/he lose focus on the immediate task because s/he mentally revisits the embedded bad memory experience s/he encountered earlier during training when your loud verbal excitement ended in a negative or compulsion action toward himself/herself?
Bear in mind canines are masters of recognition; they have no reasoning skills. These are just a few of the questions that you must keep in mind and mentally prepare for through training to eliminate the unexpected, especially when real-life street situations become tense.
As a final note just remember that if you have not tried it in training, do not try it in a real situation to “just see” what will happen. This will only lead to chaos or catastrophe. Know you limitations, train hard and keep your training realistic. For more information, please feel free to contact me:
Denny A. Kunkel
(260) 493-4427
Patrol | Narcs | SRO
Rabies & Other Must-Have Vaccinations Against Canine Disease
by Ann Yowell, DVM
Vaccinations are one of the most important aspects of preventative health care that you can provide for your dog. There are many different vaccinations – you and your veterinarian can work together to determine exactly which vaccinations your canine needs. These are the most common vaccinations and the diseases they prevent.
RABIES
Rabies is one of the most deadly viral diseases in the world. It is almost always fatal – there is no treatment for rabies, so if you get it, you will probably die. There have only been a few humans that have contracted rabies and survived. The odds of surviving if you get it is zero. Due to the almost 100 percent fatality rate and serious potential public health issues, it is imperative to vaccinate for rabies – in fact, rabies is the only vaccination that is required by law.
Rabies is a viral disease that affects the nervous system. The rabies virus is transmitted through specific body excretions and tissue. Saliva, brain and nervous tissue are considered infectious material that can transmit the rabies virus. Rabies is transmitted when the virus is introduced through a bite wound, open cuts on the skin or onto the mucous membranes (mouth or eyes).
There are two types of exposure to rabies – bite and non-bite. Any penetration of the skin by teeth constitutes a bite exposure. All bites, regardless of the site, represent a potential risk of rabies transmission, but that risk varies with the species of the biting animal, the anatomical location of the bite and the severity of the bite wound. Bite exposures are the most common type of exposures.
Non-bite exposures are not as common, but can occur. The contamination of open wounds, abrasions or mucous membranes by saliva of a rabid animal constitutes a non-bite exposure. The most common type of non-bite exposure that we encounter is after a pet has had an altercation with a rabid animal and the owner checks the pet. They run their hands through the fur, checking the wounds, and if saliva from the rabid animal comes into contact with open wounds on the pet owner’s hands, they become a victim of non-bite exposure. Non-bite exposure is common for people in the veterinary field. An animal with rabies doesn’t always exhibit the typical signs and if we examine their mouth and oral cavity without gloves on, there can be a non-bite exposure.
Symptoms include any behavior change-from the animal becoming aggressive, while others become very docile – difficulty in swallowing, excess salivation and drooling, depression, stupor, varying degrees of paralysis or any neurological signs. A lot of people think that animals with rabies are scared of water because they won’t drink, but actually, the virus causes paralysis of the muscles needed for swallowing. Since they can’t swallow, the saliva builds up in their mouth, resulting in drooling and foaming at the mouth. The paralysis prevents them from swallowing, so they can’t drink – thus the idea that animals with rabies are scared of water. This is how the term hydrophobia (fear of water) came to be commonly used to describe rabies.
Rabies vaccination is required by law. In most states, the first rabies vaccination is given as early as 12 weeks of age. The very first rabies vaccine a K-9 gets provides protection for one year. In most states, all rabies vaccinations given after the initial one-year vaccination are good for three years. There are a few states that only recognize yearly rabies vaccinations. Your veterinarian will know the requirements of your state. Since most working K-9s are older than one year when the handler gets them, they usually have had at least one rabies vaccination.
If your K-9 ever has an altercation with a wild animal, such as getting into it with a raccoon when running a track, you need to have the rabies vaccination boosted within 72 hours of the altercation. Even if your K-9 is not due a rabies vaccination, you still need to get him boosted just in case his altercation was with a rabid animal.
Federal law states that any K-9 that bites someone has to be quarantined for 10 days even if they have a current rabies vaccination. Most states have a General Statue that will exempt working K-9s from the quarantine if the bite occurred during the line of duty. Due to the 10 day quarantine being a law, I advise all K-9 handlers to carry a copy of their state’s General Statue that shows this exemption (the attorney for your law enforcement agency should be able to get you a copy of this GS). I also advise that you have three copies of your K-9’s current rabies vaccination certificate – one to keep in your patrol vehicle, one to keep at the department and one to keep on hand at home. I know this is picky, but it can sure come in handy if your K-9 bites someone and animal control or the attorney representing the bitten party requests them.
DISTEMPER
Distemper is a highly contagious viral disease that is found worldwide and was once the leading cause of death in puppies. It causes respiratory signs, high fever, pustular discharge from the eyes and nose, poor appetite, depression and neurological signs such as partial paralysis. Distemper is often fatal and dogs that do survive usually have life long problems. Distemper is easily preventable with vaccinations and I have never seen it in a properly vaccinated dog. However, it has been making a comeback in the last decade due to owners not vaccinating their dogs as they should and because it can affect wildlife (such as raccoons), which can serve as an infectious reservoir that K-9s often come into contact with.
HEPATITIS
Hepatitis is a viral disease that primarily affects the liver but can affect other organs such as the kidneys. It has a wide variety of symptoms that vary from mild to severe and include nausea, vomiting, light-colored stool to bloody diarrhea, abdominal distention, and jaundice (yellowing of the mucous membranes, skin, and the white portion of the eyes). It is spread through contact with urine, nasal or oral discharge from infected animals.
LEPTOSPIROSIS
Leptospirosis is a life threatening disease that is spread through the urine of infected animals. It primarily affects the kidneys resulting in kidney damage and failure but can affect other organs such as the liver. Symptoms include depression, loss of appetite, fever and joint pain. Humans can get lepto through contact with urine from infected animals. Lepto is often fatal.
PARVOVIRUS
Parvo is a highly contagious virus that attacks the intestinal tract causing nausea, vomiting and severe bloody, very foul smelling diarrhea. It primarily attacks the intestinal tract but can also affect the heart, causing irreversible and permanent heart damage. The heart damage may occur months to years after recovery from the intestinal form. Death is usually due to an overwhelming infection of the intestinal tract and severe dehydration due to the combination of the vomiting and diarrhea. The virus is spread through the feces of the infected dog.
Treatment includes hospitalization, intravenous support and injectable medication. Even with aggressive treatment, parvo is often fatal. There are some breeds – Dobermans, Rottweilers and German Shepherds – that seem to have a harder time with parvo than other breeds.
PARAINFLUENZA
Parainfluenza is a virus that causes an upper respiratory tract infection. It is usually spread through the nasal secretions of infected dogs. It is highly contagious and can cause mild to severe inflammation of the trachea (windpipe), bronchi and lungs. Symptoms include a cough that is usually non-productive but can be productive. It can be self-limiting, but since it affects the respiratory tract, it can compromise the affected dog leading to a secondary bacterial pneumonia.
CORONAVIRUS
Corona is a virus that attacks the intestinal tract similar to parvo. It causes vomiting and pronounced bloody diarrhea. It is treated with hospitalization, intravenous support and injectable medications.
BORDETELLA
This is a very contagious, upper respiratory tract disease commonly called kennel cough. It is not fatal but is a pain to treat as it causes a dry, hacky, non-productive cough that hangs on and on. It can spread through direct contact between infected dogs and can quickly spread in any area where dogs congregate. Most boarding and grooming facilities require dogs to have this vaccination. This vaccine comes in an injectable and a nasal form.
LYME
Lyme disease is a tick borne disease. It is spread through the deer tick and this tick must stay attached to the dog for 24 to 48 hours in order to transmit the disease. Daily inspection of your dog with removal of any ticks noted can decrease the chance of your dog getting it – however the deer tick is tiny and very difficult to see. Symptoms include loss of appetite, fever, swollen lymph nodes and some show generalized pain, soreness and pronounced stiffness. Lyme disease is treated with antibiotics. However, control of ticks is encouraged to prevent possible exposure. Use of topical flea and tick control (Frontline or Advantix just to name a few) or use of Preventic tick collars is recommended.
You commonly see vaccines listed by their initials such as DHLP PC (Distemper, hepatitis, lepto, parvo, parainfluenza and corona) and the combination of these vaccinations vary between companies. Many of the discussed vaccines are given in a combination injection. Lyme, rabies and bordetella vaccines are given individually and not in combinations. Not all the discussed vaccinations are needed by each dog. The individual dog and their geographical location will help determine which vaccinations are needed. This decision about which vaccines and how often they are given can be determined by the handler and their veterinarian.
Some dogs will lay around the day they get their vaccinations, feel bad and may not eat or drink very well. Most are back to normal within 24 hours. Some will show a little soreness at the injection site that is usually self-limiting. About 10 percent of all dogs that are vaccinated will have a small knot at the site of injection about five days after the vaccine is given. This knot usually resolves in 10 to 14 days.
Vaccinations are an inexpensive, but vital portion of preventative health care for your canine. There is nothing more tragic, or more irresponsible, than to see a dog suffer from a preventable disease due to a lack of vaccinations.
Odor Detection Training
Sir Isaac Newton said it best “For every action there is an equal an opposite reaction”. What we do or fail to do in our training programs will have an equal and significant impact on how we perform in real world duties as a narcotics detection team. Successful teams are built on utilizing sound basic fundamentals learned through their initial training as an entering narcotics detection team. K-9 Teams who possess and execute sound training fundamentals have less potential in initiating improper training practices, which could ultimately set their programs back for months, if not years, if these training practices were not identified and reversed.
Regardless of whether a handler has a pre-trained dog or a green dog, our knowledge, experience, and training methods will to a large extent, dictate the K-9 teams performance, both in training and real world job duties. Basic Fundamental Training is a team-building concept. Basic Fundamental Training is not just about training the dog correctly, but more importantly, it’s about training the handler, who will in the end, determine the dogs overall success through the use of proper training methods and techniques.
This author is a firm advocate of the adage that “Repetition Builds Conditioning”. This applies in most disciplines. The basic premise being, that repetition of any function conditions the participant(s) toward a specific learned skilled behavior. An example of this would be firearms training. This training principle is also a key component in the training of narcotics detection teams.
Teams with sound basic fundamentals will achieve maximum potentials through conditioning training by repetition. In comparison, K-9 teams lacking sufficient basic fundamentals, who utilize conditioning training by repetition, and who have limited knowledge or experience in odor detection training are in fact creating a training “time bomb”.
Handlers who improperly identify and improperly correct problem areas encountered in odor detection training are in actuality compounding the teams’ problems. More often than not, handlers knowing problems to exist are hesitant in contacting outside assistance of Master Trainers or Trainers to identify and correct the teams training issues. Unfortunately, it is the dog that usually gets the blame and is released as unsuitable from the detection program for problems that were in fact, created and compounded by the handler.
Next “Batter Up”, dog candidate number two (2) enters and the process repeats itself. More often than not, many dogs washed out from training programs, for trainability reasons, could have actually been avoided had the handler possessed the developed training skills or sought outside training assistance to address the problems for which the dog was being returned. A few years ago, I personally knew one handler/trainer who was caught in this cycle. In a period of eleven months, this handler received and returned nine (9) K-9’s from the departments two dog K-9 Unit citing trainability reasons. As a result, upon numerous canines being rotated out for various reasons, the handler/trainer lost credibility with the department in which he was eventually removed from the K-9 program altogether.
Establishing basic fundamentals in a detection program should incorporate the use of not only hands on field training, but also that of a comprehensive educational course of instruction for handlers, which addresses numerous specialized topics pertaining to the field of narcotics detection. In addition, practical, written and or oral testing at the conclusion of the training process is a useful tool to determine the handlers’ knowledge of hands on application procedures and classroom material covered during the course of instruction. This testing verifies the handlers’ overall understanding of the training process to both the training agency/organization and or the handlers department, minimizing future possibilities of improper training practices developing within the teams continuing in-service training. From a personal viewpoint, these testing results can and do attest to a teams’ credibility, in addition to attained team certifications, as being competent and knowledgeable based on their level of experience in a court proceeding, thus limiting attacks by defense attorneys regarding a K-9 team’s credibility.
The next forthcoming issue of “Viewpoints” will address the subject of Building Solid Basic Training Fundamentals. An in-depth study will be provided identifying key components in the training of narcotics detection canines. If you have any questions or comments please feel free to contact MT Mike Johnson
Copyright 2007 – All Rights Reserved
Senses and Instincts of the Dog
Your dog has a personality that is based upon one of four instincts. He/She also has three unique senses that are used in everyday life. The three basic senses are smell, hearing and sight. Dogs are born with four behavior drives called instincts, they are the pack drive, prey drive, defensive drive and flight drive.
A dogs sense of smell is 1000 to 10,000 times more sensitive than a humans and is the most acute sense he/she has. Dogs communicate with each other and the world through odors. To a dog scent is a three dimensional odor image that provides them with more detail than a photograph does for humans.
The acute hearing of dogs is far superior to humans. They can easily hear high pitched sounds that humans can not hear. Our hearing is limited to sounds in the 20 to 20,000 hertz range. Frequencies greater than 20,000 hertz are called ultrasound – humans can not hear those frequencies but dogs can hear frequencies up to 67,000 hertz.
Due to their wide set eyes dogs have a vision field of 250 degrees, while our field of view is only 180 degrees. This makes them far superior to us in detecting movement. Dogs are less visually acute than humans, making it harder for them to determine fine details. A dog needs to be within 20 feet of an object to see it clearly. They also have difficulty focusing on objects closer than one foot from their eyes. For objects very close, they have to rely on their sense of smell, hearing or taste for identification. Dogs do have color vision, but few color receptors in the eye, they primarily see colors in shade of blue and yellow. They are better in differentiating subtle shades of gray which helps with their low light vision. Dogs see much better in dim light than we do.
The pack drive comes from the dogs desire to live with a group of family members, with the family members being humans or other dogs. Each pack is headed by a leader, which is called the Alpha. A properly socialized dog accepts it’s owner as the pack leader. When a dog recognizes the owner as his pack leader, his strongest desire is to please the “leader”.
The prey drive comes from the need for the dog to hunt for food. Pets don’t need this drive to provide themselves with food, but we still see this drive in their daily actions, such as chasing balls, stalking toys and chasing cars.
The defense or “guard” drive is a dogs inherited need to protect his/her territory. Dogs with a strong defense drive are self confident, stand their ground, guard their territory, family and sometimes their food and toys. The flight drive is most often seen in timid dogs. They are unsure of new situations, are stressed if away from their pack (or owner), may have submissive urination and become fear biters.
This article was written by and provided by: Dr. Ann Yowell, DVM
Foster Animal Hospital
730 Concord Pkwy
Concord, NC 28027-6036
(704) 786-0104
Give Your Canine the Advantage
We know that the three major things that can kill the odor of the illegal contraband that our dogs are sniffing for:
- Time
- Ultraviolet Light
- Carbon Monoxide
Routinely, we pull up to a traffic stop, or are called out for our dog to conduct a vehicle sniff. We usually pull up behind the initiating officers’ squad, get our highly trained and creditable police canine out and without regard for wind direction and vehicle position we conduct a walk around the vehicle.
When we do this we sometimes are not giving our dog the advantage. When the wind is at our backs, we now have two vehicles (squad cars) blowing carbon monoxide right in to our search area. Naturally there will often be passing motorists, and that can’t always be controlled. But we can control the position of our squads; to give our dogs more of an advantage.
In the colder months your wind direction can easily be determined by looking at the exhaust of the initiating officers’ squad when you first pull up to the scene. There are numerous volumes written on tactical positioning of your squad while conducting a traffic stop. We don’t want to ask the initiating officer to give up any tactical advantage, or go against department policy while conducting a stop. So we learn to work with what we are dealt. But it is not out of the question once the occupants of the vehicle are removed and secured, to ask the officer to back his squad up a little if need be.
We also have to keep in mind officer safety, and the safety of the occupants once removed from their vehicle. There is much controversy as to the location to place multiple occupants of a vehicle while conducting a vehicle sniff. Generally six feet from the passenger door of the leading squad car would be safe in case a passing motorist crashes into our scene. No two traffic stops are the same, so it’s going to be a judgment call for the officers.
If you have trained your fellow officers, or they are trained in drug interdiction stops, prior to you arriving in most cases they will have the driver of the vehicle already removed, and separated from the other occupants of the vehicle. United States v. Jamal Williams (419 F.3d 1029 [2005]) States an officer effecting a lawful traffic stop may order the driver and passenger out of the vehicle.
Have the initiating officers’ request that the driver do the following prior to them exiting the vehicle…
- Shut off vehicle.
- Place the key switch on AC.
- Place the temperature switch to medium, or half way between hot/cold)
- Place the fan switch on medium.
- Roll up the windows.
This is sure to get that odor circulating through the vehicle and forcing it out the door seams, giving your canine a greater advantage. If the driver doesn’t want to comply with this request, don’t force it. They have the right to refuse. If the vehicle contains a trained odor your certified, highly trained, and creditable police canine will probably indicate anyway. But this procedure does give the canine an advantage.
If you watch your dog on a hot day after it takes a drink, it will more often than not lick its’ nose. They do this to replace the moisture in their nose. Your dog relies on the moisture in its nose for optimum performance of its olfactory system to absorb odor molecules. They will do what they can to keep it moist on its own but sometimes, due to heat, being over worked and becoming fatigued it can’t keep up. When your dogs’ nose is dry its scenting ability is cut to almost half of what it normally is.
Give your dog the advantage. Prior to conducting a sniff offer him/her a drink of water. Often they will turn it down because they are more interested, and excited about getting out of the squad. You should however put some water on your hand and rub it on their nose. This should be sufficient no longer than a vehicle sniff takes.
Douglas A. Daugherty
(812)910-0735
Narcs | SRO
**Michael D. Johnson
(812) 278-1423
Patrol | Narcs | SRO
Hyperthermia (Heat Stroke)
by Ann Yowell, DVM
Hyperthermia is an elevation in body temperature that is commonly referred to as heat stroke. Heat stroke occurs when the heat gained exceeds the body’s ability to dissipate heat. Dogs are much more susceptible to heat stroke than humans are. Humidity also plays a significant role in the cause of heat stroke as it interferes with a dogs ability to eliminate heat.
A dog’s normal body temperature is between 101* F and 102.5* F. Dogs do not sweat through their skin like humans do. Dogs primarily dissipate their body heat through panting. They do have some ability to sweat through their nose and foot pads but this ability is limited. If a dog cannot dissipate heat, the internal body temperature will rise. Once it gets above 105* F, damage to the body’s cellular system and organs start to occur and may become irreversible.
Some dogs have a higher risk of heat stroke. Some of the predisposing factors include: Dogs with a dark or thick hair coat – dark coated dogs or dogs with a thick undercoat have a harder time dissipating heat than dogs with short hair or a light colored coat. It is very important to keep your dog well groomed. Your dog’s coat should be regularly brushed to remove the loose, dead undercoat, so that he can stay cool. The FURminator tool, a slicker brush and long undercoat rake, will make easy work of grooming your dog and aid in helping him stay cool.
Dehydrated dogs – dogs unable to maintain their hydration can become dehydrated quickly on hot and humid days. Panting also hastens dehydration. Always have fresh cool water available for them to drink. You may have to change the water up to three times a day to ensure that your dog has cool water to prevent him from dying of heat stroke.
History of heat stroke – Dogs that have had a heat stroke before are more susceptible to another heat stroke.
Overextended dogs – heat stroke doesn’t always occur during extreme temperatures. Working in the heat of the day or on very humid days can result in heat strokes.
Tracking is a prime time for your dog to overheat. He is excited, he is running a track, he has his nose down and is not panting as he should because in order to track, he has to keep his mouth closed, or partially closed, which will interfere with his ability to pant. Rarely is he drinking water when running a track. This situation provides an excellent opportunity to end up with a heat stroke.
The handler must also keep in mind that during the summer, if your dog is standing on asphalt or concrete, all that heat is coming up from the surface and hitting your dog full force on his chest and abdomen – he is absorbing a lot of heat from the surface he is standing on. And, probably burning his paws too.
Muzzled dogs – When muzzled, the dogs cannot breathe or pant efficiently on warm days so be careful when muzzling your dogs during warm weather.
Learning the Signs – Heat stroke occurs when heat gain exceeds the body’s ability to dissipate heat. High temperatures can cause chemical reactions that break down body cells which lead to dehydration and blood thickening. This puts strain on the heart, leads to blood clotting and possible tissue death. Cells of the brain, liver and intestinal tract are usually the first ones to be adversely affected. Once a dogs body temperature reaches 105? F or greater, he risks the chance of brain damage, multiple organ failure and death. Even if he receives treatment and survives, he may suffer permanent organ damage and lifelong health complications.
Heat stroke is deadly and always an emergency. At the first sign of heat stroke, immediately start to cool your dog down. Use any means available to start the cooling process. Try to immerse his body in cool (not cold) water. If you are by a stream or pond, get him in it. If you are in a yard, look for a outdoor water spigot and hose. If by a store, grab some bags of ice. If you have the opportunity to immerse his body, you may have to physically hold his head out of the water as he may be too exhausted to even hold his head up. Other methods off cooling include moving him into air conditioning, putting cool wet towels or ice packs on his neck area, armpits, groin and stomach areas. You can also wet his tongue but don’t try to force water in his mouth as he may aspirate it into his lungs. Once you start the cooling process and he is showing some response, transfer him to your veterinarian for further treatment.
We normally discontinue the cooling process when the body temperature drops to 103*F. Over-cooling can cause hypothermia which results in an entirely new host of medical problems. If the handler has a thermometer (which they should have in their emergency first aid kit but if they are running a track, the thermometer will probably not be available) he can take the temperature and monitor the dogs response.
Most handlers will not have a thermometer available to them and are not aware of when the temperature is beginning to drop. In these cases, I advise the handler to start to cool his dog and when they do see a positive response, such as the panting beginning to resolve, the panicked look on the dogs face is subsiding and he is not as distressed, transport him to the veterinarian. If you start to cool your dog and you do not see any response within 10 to 15 minutes, you should transport him. With the availability of cell phones, I would advise you or someone with you to contact your veterinarian when you start the cooling process so you can keep them advised of the situation and they can advise you when to transport.
When a heat stroke dog is presented to the veterinarian, the treatment varies depending on the dogs body temperature and physical exam at the time of presentation. It may include IV fluids, cool water, enemas, continued cooling techniques and medical treatment. He will be monitored for shock, blood clotting abnormalities, kidney failure, heart abnormalities and respiratory distress. Even with rapid in-field cooling and presentation to the veterinarian, heat stroke can still result in irreversible brain damage, irreversible organ damage and even death.
Heat stroke is preventable. Never leave your dog unattended in a car on a warm day. It does not have to be a hot day for the temperature in an enclosed car (even if the windows are down) to skyrocket to dangerous levels in just a few minutes. Dying in an overheated car is not only a miserable death, it is inexcusable. Avoid vigorous activity on hot or humid days – if they have to work, provide them with fresh cool water, monitor closely for any signs of overheating and if noted, stop work immediately. Keep fresh cool water available at all times. If a canine suffers from heat stroke while working, I feel that the handler is responsible.
Some dogs can completely recover from heat stroke if it is caught in the early stages and aggressively treated. Others will suffer from permanent organ damage and require lifelong treatment. However, many dogs do not survive heat stroke and die. Prevention is the key to keeping your dog safe.
Signs of Heat Stroke
- Rapid, frantic panting
- Hyperventilation
- Dark red gums and mucous membranes
- Anxious, panicked expression
- Salivation early on then dry gums as the heat prostration sets in high fever
- Staring/dizziness or disorientation/staggering
- Refusal to obey commands
- Lying down and unwilling (or unable) to get up
- Rapid heart beat
- Diarrhea that may have bright red blood in it
- Vomiting
- Collapse and/or loss of consciousness
Heat stroke is deadly and always an emergency. At the first sign of heat stroke, immediately start to cool your dog down. Use any means available to start the cooling process. Try to immerse his body in cool (not cold) water. If you are by a stream or pond, get him in it. If you are in a yard, look for a outdoor water spigot and hose. By a store, grab some bags of ice. If you have the opportunity to immerse his body, you may have to physically hold his head out of the water as he may be too exhausted to even hold his head up. Other methods of cooling include moving him into air conditioning, putting cool wet towels or ice packs on his neck area, armpits, inguinal and stomach areas. You can also wet his tongue but don’t try to force water in his mouth as he may aspirate it into his lungs. Once you start the cooling process and he is showing some response, transfer him to your veterinarian for further treatment.
We normally discontinue the cooling process when the body temperature drops to 103* F. Over-cooling can cause hypothermia which results in an entirely new host of medical problems. If the handler has a thermometer (which they should have in their emergency first aid kit but if they are running a track, the thermometer will probably not be available) he can take the temperature and monitor the dogs response. Most handlers will not have a thermometer available to them and are not aware of when the temperature is beginning to drop. In these cases, I advise the handler to start to cool his dog and when they do see a positive response, such as the panting beginning to resolve, the panicked look on the dogs face is subsiding and he is not as distressed, transport him to the veterinarian. If you start to cool your dog and you do not see any response within 10 to 15 minutes, you should transport him. With the availability of cell phones, I would advise you or someone with you to contact your veterinarian when you start the cooling process so you can keep them advised of the situation and they can advise you when to transport.
When a heat stroke dog is presented to the veterinarian, the treatment varies depending on the dogs body temperature and physical exam at the time of presentation. It may include IV fluids, cool water enemas, continued cooling techniques and medical treatment. He will be monitored for shock, blood clotting abnormalities, kidney failure, heart abnormalities and respiratory distress. Even with rapid in-field cooling and presentation to the veterinarian, heat stroke can still result in irreversible brain damage, irreversible organ damage and even death.
Heat stroke is preventable. NEVER leave you dog unattended in a car on a warm day. It does not have to be a hot day for the temperature in an enclosed car (even if the windows are down) to skyrocket to dangerous levels in just a few minutes. Dying in an overheated car is not only a miserable death, it is inexcusable. Avoid vigorous activity on hot or humid days – if they have to work, provide them with fresh cool water, monitor closely for any signs of overheating and if noted, stop work immediately. Keep fresh cool water available at all times. If a canine suffers from heat stroke while working, I feel that the handler is responsible.
Some dogs can completely recover from heat stroke if it is caught in the early stages and aggressively treated. Others will suffer from permanent organ damage and require lifelong treatment. However, many dogs do not survive heat stroke and die. Prevention is the key to keeping your dog safe
FIRST AID KITS FOR K-9s
By Dr. Ann Yowell, DVM
A well -equipped first aid is an essential piece of equipment with any K-9 team. Rapid response by the handler to any form of injury or trauma to the canine can make a life or death difference for the canine. I have seen life threatening injuries treated in the field, thus stabilizing the canine and resulting in complete recovery. You might never need a first aid kit, but it is one piece of equipment you don’t want to be caught without if you do need it.
There are many different commercial first aid kits for K-9s available but I personally like to put them together based on the individual needs of the K-9 team. No matter the source of your first aid kit, it isn’t very helpful unless you get training on the use of the equipment. You need to take your kit to your veterinarian and let him or her go over it. See if your vet recommends any other equipment or drugs based upon your individual dog. Your veterinarian can also train you on when and how to use the drugs and equipment in your kit. I put together the first aid kits for all the K-9 teams under my care. But most importantly, all the handlers take a first aid class with me and these classes are repeated every six months. Not only do the handlers learn how and when to use the first aid kit, they are trained on such things as CPR, how to treat for in-field accidental drug ingestion, life-threatening traumas, allergic reactions and more. The handlers are also taught proper techniques on restraining their dogs. This is one of the most important things they can learn – if I have to go in the middle of the night to treat a dog, that handler needs to know how to hold him for me. Handlers are even taught how to restrain their K-9s and hold off veins in case I need access for use of IV medication or need to collect blood.
We are going to discuss the basic first aid kit. If you elect to make your own first aid kit, I really like using a tackle box. Yes, a tackle box like what is used for fishing. They have a lot of individual compartments, are usually tiered which makes for easier access, are usually plastic so they are easy to clean and they are tough. Durability is helpful since most are riding in the back of the vehicle and getting banged around a lot. A tackle box works great. No matter what type of container you have for your first aid kit, you always need to keep it in an area that is readily accessible and easy to find in case you have to send someone else to grab it out of the back of your vehicle. One handler used a glow-in-the-dark orange tackle box and wrote K-9 First Aid Kit in black on it. Hard to miss that one! You should also keep your first aid book with your first aid kit. All handlers should have a first aid book that tells how to treat your K-9 in certain situations, how to use in-field medications and what doses should be given.
EQUIPMENT FOR YOUR FIRST AID KIT
Thermometer – an indispensable part of a first aid kit. You can NOT accurately determine a canine’s temperature without a thermometer. They are especially important during warm/hot weather when you need to monitor for heat exhaustion. There are many different types of thermometers on the market but I advise a digital one over the glass type. The digitals are inexpensive and are more durable than glass thermometers, which is important since most first aid kits are getting a pretty rough ride in the back of your vehicle. A dog’s temperature must be taken rectally. Prior to use of your thermometer, please apply some lubricant to the tip to make insertion easier for your canine. If you don’t have lubricant available, spit on the tip – I know this sounds disgusting, but it is better than nothing. When using the thermometer, you don’t have to insert the entire thing; you can get an accurate reading by just inserting the silver tip. No matter if you use a glass or digital thermometer, keep your hand on it and don’t let go while you are using it – the rectum is like a vacuum so if you place something in it, it can suck it right in. There has been more than one lost rectal thermometer. Oh, yeah…retrieval of a lost rectal thermometer generally involves surgery, So keep a grip on it.
Bandage Scissors – used to cut bandage materials, remove bandages or for general cutting. They have one blunted end to prevent accidental cutting of the K-9 and over-sized, curved handles to make them easier to handle. If you are removing a bandage from your canine, make sure you put the blunted end between your dog and the bandage to decrease the chance of cutting your canine.
Needles and Syringes – you need to carry a variety of sizes of needles and syringes. Some handlers are trained to give injections in the field but even if your are not, they are useful for flushing wounds and drawing up medication for oral and/or topical use.
Disposable Latex Gloves – many people in law enforcement always carry these but they are also a good addition to your first aid kit. They are useful if you have to clean a nasty or bloody wound and keep your hands clean when giving oral charcoal, etc…
Hemostats – instruments that when clamped (closed) they lock and hold whatever they are closed on. They can be curved or straight. I recommend both but if you can only afford one, get the curved ones. Hemostats have a wonderful variety of uses. They are used to clamp vessels that are hemorrhaging, hold tissue, pick debris from wounds, remove foreign bodies from the ears (sticks, grass seeds, etc..), remove foreign objects from the mouth and remove ticks, among other things.
Muzzle – probably the most important item in your first aid kit. It ranks right up there with your veterinarian’s phone number. I am not talking about the muzzles you use in training, but the little nylon muzzles that snap at the base of the head behind their ears.
These are easy on and off, easy to clean and are inexpensive. You should always have a muzzle in your first aid kit where it is easy to find or hanging in the back of your vehicle so if someone else has to get it for you, it is easy to locate. You should also fit it to your dog’s head and adjust the proper tightness so it is ready when you need it. Most of the time if you need to place a muzzle, you are going to be in a hurry, so it helps if it is ready. Muzzles not only decrease the chance of you getting bitten, they also serve as a great handle if you need to hold the K-9’s head steady to check/flush/treat his eye or a head wound. A leather agitation muzzle works great also, but usually won’t fit into your first aid kit.
BANDAGE MATERIAL FOR YOUR FIRST AID KIT
Gauze Sponges or Surgical Sponges – squares of absorbent cotton that are used to clean ears, clean wounds, place against wounds prior to bandaging, place under bandages to help control bleeding and to place under bandages to hold antibiotics against wounds. They come in a variety of sizes but 2 in. X 2 in., 3 in x 3 in. And 4 in x 4 in. are the most common. I recommend you carrying at least two sizes and lots of them.
Soft Roll – this is a soft, absorbent roll of bandaging material that has multiple uses. You can pad a wound with it, use it to hold surgical sponges against a wound or provide support to an area. It tears easily with your hand and is easy to handle.
White Surgical Tape – comes in several sizes but 1 in. and 2 in. are the most useful. It can easily be torn by hand to make the strips even narrower. It is most commonly used to help secure other bandage materials to the dog.
Elastikon – a type of bandage material that has adhesive on one side and has cotton material on the other side. It is used for a supportive bandage over soft roll and has some mild adhesive properties against the dog’s hair. It cannot be torn with your hands and generally has to be removed with bandage scissors. (Elastikon is a Johnson & Johnson product.)
Vetrap – a wonderful bandage material that is easy to handle, sticks to itself but not the dog, can be torn with your hands many times and can be removed without bandage scissors as it doesn’t stick to the dog. The biggest drawback is that it has to be replaced often because when it lies in the back of the first aid kit in a hot vehicle, it becomes sticky, hard to handle and doesn’t hold well. It comes in 1 in., 2 in. And 4 in. sizes with the 2 in. And 4 in. being the most useful. I recommend carrying both sizes. It also comes in a variety of colors and prints! (Vetrap is a 3M product.)
MEDICATIONS FOR YOUR FIRST AID KIT
I have included a list of the medications that should be included in a first aid kit, but there are other medications your veterinarian may deem important for you to carry. All doses of medication, whether on this list or prescribed by your veterinarian, should be determined by your veterinarian for each dog based on the individual dog’s weight and health status.
Diphenhydramine (Benadryl) – an anti-histamine that is excellent to use with many allergic reactions and bee/insect stings. Dogs take a higher dose of Benadryl than humans. It comes in a capsule, a tablet and a liquid form. Dogs hate the taste of the liquid form and you would have to give a large amount for a proper dose, so I do not recommend liquid form. Capsules and tablets are much easier to use with a canine. You should use it a least twice per day and need to continue giving it several days after the signs you are treating are resolved.
Hydrogen Peroxide – can be used to clean wounds but is not my favorite medication for wound cleaning. I prefer an antibiotic solution to flush wounds. Hydrogen peroxide (H202) is used to induce vomiting. If a dog accidentally ingests an illicit drug or certain poisons such as rat/mouse poison, you can give H202 orally to induce vomiting. Dogs don’t really like the taste of H202 so getting it in them is a little challenging and very messy. This can also be a life-saving process for a handler to start in the field in order to get the dog to vomit the ingested material prior to transporting to the vet. Not only will you need to get the appropriate dose for your K-9 from your vet, he or she will also need to show you how to administer it and to tell you WHEN to induce vomiting. If you have a concern about if you should induce vomiting or not, call your vet – this is where cell phones are of vital importance.
Triple Antibiotic Ophthalmic Ointment Without A Steroid – an antibiotic eye ointment that should be used when you are concerned about eye irritation. It is also the topical antibiotic recommended to use for any facial wound or abrasion close to the eye – if the dog rubs the antibiotic ointment from the facial wound/abrasion into the eye, it won’t hurt the eye. There are many different brands of topical antibiotic ointment. Ointments can be a little difficult to apply to a canine’s eye so you should get the application process down before you need it. You only need a small amount of the ointment in the eye, but it is hard to get that small of an amount of the ointment off the end of the tube. The end of the tube scares a lot of people as they feel they might poke the dogs eye out – in 24 years of practice, I haven’t had a client who has poked an animal’s eye out.
Topical Antibiotic – includes many different antibiotics such as panalog, dermalone and animax. One of these is excellent to carry to use for topical use on wounds. They are not to be used on deep wounds, but on superficial wounds. Some of the topical antibiotics can also be used in the ears, and I recommend one that can serve this dual purpose. (Panalog is manufactured by Ft. Dodge. Dermalone is manufactured by Vedco. Animax is manufactured by Pharmaderm.)
Oral Antibiotic – to have an oral antibiotic always on hand, such as cephalexin, should be a decision made by your veterinarian.
Antibiotic Solution – used to clean superficial wounds and lacerations. It is a solution, thus it is easy to just pour on the wound or pull up in a large syringe and flush the wound. This is only to be used in the ear at the direction of your veterinarian and is not for use in the eye.
Saline Flush – used to flush superficial wounds, road rashes/wounds, irritants from the eye (like dust or grass seeds) or just to get the hair wet so it can be parted for you to inspect an area for a possible injury. Saline flush is not going to irritate the eye or a wound so it is very safe to use. To get some force when flushing a wound, draw it up in a syringe and flush through a large bore needle. Another easy way to do it is just get saline eye solution that comes packaged in a squirt bottle – you can just flip the little lid and squeeze.
Activated Charcoal with Sorbitol – a thick, black messy liquid used to decrease the absorption of illicit drugs or toxins from the intestinal tract after their accidental ingestion. If a dog ingests an illicit drug or a toxin, based upon what he ingests, we usually recommend inducing vomiting. Once the stomach is empty, you give the activated charcoal to help absorb anything that may have gave gotten past the stomach into the intestines. Most dogs do not like oral charcoal. It is VERY messy to administer and you will probably end up with a large amount of it on you, in your hair, on your car, on your dog, just about everywhere.
Prednisone – an oral steroid that has many different uses. As with an oral antibiotic, your veterinarian should decide if it is a medication you should keep on hand for your K-9.
Sterile Lubricant – used to lube the tip of the thermometer prior to use – your dog will really appreciate this gesture. Sterile lube can also be placed in wounds, such as road burns, after the wounds are flushed but prior to bandaging and transporting to the vet. The lube will help decrease the amount of debris and contamination that can get into the wound. The lubricant can also come in handy when your dog gets himself stuck. One handler’s dog caught his toe in a drain grate while running a track and he actually got the toe out by lubing it up and sliding it out!
QuickClot / Celox Hemostatic Granules – worthwhile products for treating bleeding wounds. QuickClot Advanced Clotting Sponge is a temporary treatment for traumatic wounds. When you apply the sponge with direct pressure, it accelerates blood coagulation in moderate-to-severe wounds. Celox is a temporary emergency treatment for bleeding. You can pour its granules into a moderate-to-severe wound to cause instant clotting and control loss of blood. The product, which is FDA – approved, forms a strong clot that is easily removable by water.
THE NEXT STEP
You can have the best-equipped first aid kit available but if you don’t know how and when to use the contents, the kit is worthless and just taking up space in your vehicle. No matter what I recommend or what I tell you, it is still imperative you meet with your veterinarian to learn how to use the equipment, clean wounds, apply bandages, and to know when to use the medications, how to use them, what they treat and what doses to give. Training on in-field treatment for your canine can mean, and often has meant, the difference between life and death for a canine.
Helping Your Partner When He’s Down
Emergency K-9 Procedures – CPR
by Ann Yowell, DVM
Cardiopulmonary resuscitation (CPR) is a form of artificial breathing that includes assisting the heart to maintain blood flow through the body and respirations to keep oxygen moving to the lungs. Everyone is familiar with CPR and most have attended a CPR class. Many do not know that you can perform CPR on pets. The procedure is similar to the traditional mouth to mouth resuscitation for humans, but the difference is that with dogs, you perform the procedure mouth to nose. That’s right, mouth to nose. Sounds odd, but it works and knowing how to perform CPR and mouth to nose resuscitation on your K-9 could literally save his life.
There are many things that could cause you to be in a position to need to perform CPR on your K-9 including, but not limited to, multi-system trauma, such as hit by car and gun-shot wounds. We are going to discuss the procedure for CPR. However, you still need to get with your veterinarian to firmly establish CPR as a skill that you can perform under duress, because if your K-9 is needing CPR, you are going to be very stressed and that is not the time to be learning this procedure.
Techniques For CPR
The three basic steps include:
- A for Airway
- B for Breathing
- C for Circulation
AIRWAY
Check to see if your K-9 is breathing. If he is not breathing, check his airway first to make sure there are no obstructions. Extend his head and neck, open his mouth and check to see if there is an obstruction or excessive fluid in his mouth. Wipe his mouth to clear any excess mucous or fluid, such as blood – you can use your hand or a cloth/towel, if available. If you can visualize the obstruction, attempt to manually remove it. If there is an obstruction that you cannot manually remove, attempt the Heimlich maneuver. If this is successful, removal of the obstruction may be all you need to do if he has a heartbeat, but couldn’t breath due to the obstruction. If he has an obstruction and you cannot remove it, he may need an emergency tracheotomy. This needs to be performed by someone trained in that procedure. Once the airway is clear and your K-9 still isn’t breathing, you can proceed to perform mouth to nose and – if needed – external cardiac massage.
BREATHING
If his airway is clear and he is not breathing on his own, you will need to perform mouth to nose respirations.
TECHNIQUES FOR MOUTH TO NOSE RESPIRATIONS
- Encircle the entire muzzle area with both hands to close his mouth and hold the lips down to form a seal over his mouth. Completely cover both of his nostrils with your mouth and blow into his nose while watching to see if his chest expands. If it does not expand recheck for an airway obstruction and then try again. If his chest does expand, allow him to exhale by removing your mouth from his nose.
- Each respiration should be performed with enough pressure to cause obvious movement of the chest cavity.
- Repeat the respirations every five seconds until he is breathing on his own or until you have available medical support to take over.
CIRCULATION
If you cannot detect a heartbeat, you will have to perform an external cardiac massage along with artificial respiratory support.
TECHNIQUE FOR EXTERNAL CARDIAC MASSAGE
- Place the K-9 in lateral recumbency (laying on his side) and if possible, his head and chest lower than the rest of his body.
- Locate the heart between the fourth and sixth intercostal rib spaces in the lower third of the chest – you can quickly find this area by bringing the point of the K-9’s elbow back to the rib cage until a 45-degree angle is made with the leg and the shoulder. The elbow marks the point at which the cardiac massage is to be performed.
- Position the K-9 with his sternum (bottom of chest) away from the person performing the chest compressions. The force of the compressions are going to cause the K-9 to be pushed away from the force, thus you have to stabilize the dog’s back to prevent this. There are several ways to provide stabilization. If you are by yourself, you can kneel behind his back and use your legs to keep him immobile while performing CPR. If you are more efficient doing CPR from the sternal side, you can place his back against a solid object, such as a building, the tire of your car or a tree. If you have help, someone else can stabilize his back for you. Most find that it is easier for them to perform CPR from the sternal side thus the back will have to be stabilized.
- Place the heel of your hand at the appropriate place, then put your other hand on top of the first hand. A cardiac massage is accomplished with chest compressions performed in a cough-like manner, using enough compression force to cause a 30 percent displacement of the chest wall.
- Each compression should be held for a brief period to maximize the emptying of the blood from the heart and lungs. Time must be allowed between compressions for adequate filling of the heart with blood.
- Rate of compressions is 80-120 compressions per minute.
- A mouth to nose breath should be given by a second person – one breath every five seconds. If you are doing two-man CPR on a K-9, one person can be responsible for the mouth to nose and the other person can be responsible for the cardiac compressions.
- If you are by yourself, give 10 cardiac compressions, then give a mouth to nose respiration and continue to repeat this cycle.
I strongly urge every K-9 handler to work with their veterinarian on CPR so that if you ever have to use it, you are prepared. Many EMS crews are equipped and trained to perform K-9 CPR. So if they are available, use them. I hope that you will never have to use CPR on your K-9 – it is not a substitute for emergency veterinary care – but it can be an in-field treatment that may save your K-9’s life or stabilize him enough to get him to an emergency facility.
Dogs And Drive
Let’s discuss prey drive and hunt drive and how they effect you and your dog. Prey drive is the internal drive or amount of motivation, to chase, capture, and vanquish its prey. Hunt drive is the desire to hunt for it’s prey. The important difference between the two is:
- prey drive deals exclusively with prey while it is seen by the dog and within his eyesight only. The act of movement and an item the dog considers to be prey triggers a internal reaction within the dog.
- Hunt drive is dealing with prey after visual contact has been lost.
We evaluate the domesticated dog, through the study of wolves in the wild, because all domesticated dogs as we know came from wolves. Prey drive and Hunt drive is inherited; some dogs have a very strong prey and hunt drive and others have very little, and they may have good prey drive and little or no hunt drive.
Through the down breeding of the domesticated dogs, some of these drives have been lost and this is the single most reason for the importing of Police Service dogs today within the United States.
As a Trainer or Handler, we must understand just how much each of these drives effects our dogs, and if you understand their true meaning, you will be able to harness that power within your dog to do the things you want him/her to do.
- First of all remember, that s/he is an animal, and as an animal who was made to live their life in the wild, s/he really prior to coming into your life has very little concern for capturing bad guys, or hunting for drugs or anything else that we as human beings desire.
- The only reason our dogs do anything at all for us, is because they are being rewarded by their actions, either for food, or praise and love by us.
- It is the food or praise that is the key to communication to our animals, so when I say praise your animal after he has done a good job, in reality, your are using the only form of communication that you have to tell him/her that, yes, this is what I want from you, the same as correction or no, tells him, I don’t want this reaction from you.
- It is important for you to remember that you can not assume that your dog understands your general dislike towards an action s/he has committed, he can only make connection with something s/he did right or wrong, if you praise him/her or correct him/her at the exact time of the action, this is too many times not understood by Handlers.
Now back to hunt and prey drive. If we take an animal, who is now domesticated, but still has the inherited drives of his ancestors to go out and hunt for food, and we can harness those drives to look for bad guys or hunt for narcotics, we have given ourselves a sort of super human extension to ourselves, because he can smell John Doe and where he has walked, where as we can not, and he can smell John Doe’s dope, where as we cannot. Now, I am telling my dog, that if you find John and his dope, I will feed you, and give you water, and a place to live, and I will be your buddy, and for leaving your family in the wild, you can join my family, remember, dogs are family orientated, they were not made to spend their lives alone in kennels or tied up on chains, this is cruel and unusual treatment to the animal.
We deal with prey drive or hunt drive in different training scenarios, but it is an inherited drive that we are asking him to use when he finds something for us, whether it is finding a man in the building, or article search, or drug searches, it is always the same source of power. When the animal finds the man, and he is within visual sight of the man, his prey drive will trigger, and he will capture his prey. If you throw a ball out into a field, and the dog sees the ball being thrown, and you immediately release the dog as the ball is moving, the dog chases the ball through prey drive, but if you hold the dog until after the ball has landed for several seconds, and then you release him, it is his hunt drive that causes him to locate the prey.
Now lets add one more drive, retrieve drive. Retrieve drive is the inner desire of the dog, to bring prey back to the pack, again, s/he may have a high inherited retrieve drive or low, retrieve drive, depending on the animal. So, given the same scenario of throwing the ball into the field, and holding the dog until the ball is out of sight, I release my dog and tell him/her to find it, the dogs’ attention is gained by prey drive, but once the ball is out of sight, it is his hunt drive that pushes him to find it, when he has found the ball, his prey drive is triggered to capture it, and their retrieve drive would cause him/her to bring the ball back to you, these drives work in unison, and are called drive interaction. If one of these inherited drives are absent in the dog, it cannot be trained into him/her.
Given the same training technique with another dog with low or no hunt drive; lets try it again, we will say the dog has a moderate prey drive, we throw the ball into the field, holding onto the dog, releasing him just before the ball falls to the ground, the dogs prey drive is triggered from the moving object, and he chases after the ball, the dog sees the ball fall to the ground and captures it by picking it up and we praise him/her. We throw the ball a second time, and hold onto him, this time letting the ball hit the ground in high grass, we release the dog and tell him to find it, the dog working out of prey drive quickly runs to where s/he last saw the ball and looks for a short time, long enough for his/her triggered prey drive to cease, now lacking hunt drive, the dog no longer has a desire to find the ball, it is only the movement and visual sight of the prey that keeps their interest up. The same condition would apply to retrieve drive, the dog goes into the field, finds the ball, but will not bring the ball to you, s/he has low or no retrieve drive. The complete scenario takes only a short time from start to finish, but 3 or drives were triggered within the dog during this time, this is what we call drive interaction.
Aggression training through prey drive is a comfortable place for the dog to be, s/he does not feel threatened, it is through prey drive that we are going to teach the puppy to chase and play tug of war, as s/he learns the game of tug, we teach him/her to bite a sleeve on the arm of a man. As we talked about earlier, prey drive is triggered by movement of something the dog thinks of as prey, it is a game to him/her, s/he does not hunt and kill for his/her food as his ancestors did, but still has some of the inherited instincts. When a dog reacts to the sleeve on an arm of a man out of prey drive, it is a game of tug, although to some it may look like a vicious dog biting a man, it is in reality just a hard game of tug of war. It is through prey drive that we initially condition the dog to interact with physical contact of a man, we also through this game teach him/her different techniques or training steps on how to react to our commands and incorporate obedience that I refer to as control. An important thing to remember is that aggression training through prey drive is just the beginning of their training, and not the end product; it is later when the dog has matured and has had his/her training through prey bite development, that we start the actual training to bite a man.
I want to be sure that you understand this last statement correctly, prey bite development is the whole process beginning with a young dog tugging on a towel or puppy tug, all the way through biting the sleeve or bite suit, and incorporating the various commands of control. When the dog has matured and is comfortable with his/her training, only then can we go onto the next phase of his training, which is then refereed to as defense, which includes all prey bite work up to the point that you are currently at with your dog. After Defense has been started in your dog, we refer to his bite development.
Fight drive, is in reality where our aggression training will go. Fight drive is genetic through the inherited process of defense, s/he either has it or s/he doesn’t. It is not something that can be trained into him/her, rather it is developed. When we speak of the dog inheriting defense, it is meant that when the dog feels threatened for their life or well being, s/he will react in an aggressive manner of force, initially in the beginning of defense, the dog reacts to a threat by standing their ground with a warning or threat of an impending fight, the dog is serious about this warning, and if the pressure is continued, you are going to have a fight on your hands. When the dog is pressed into a defensive position he will either take the fight or flight process, s/he will either stand their ground or s/he will not, the dog without the genetics of defense will go into full blown avoidance and leave for their self preservation.
In order for the dog to be placed into defense, s/he must feel threatened by the helper, he must also be allowed to win their way out, and learn how to defeat the helper. As the training continues, the dog learns to defeat the helper or threat, and becomes very confident in his/her abilities to do so. It is important to understand, that the training of defense is done in short sessions without over stressing the dog and it must be done by an experienced helper.
Stress is an important factor in training defense, a dog cannot deal with stress in a capacity that we can, if stress is continued, or the dog is pushed to far in a training session, the dog will break, this is where prey drive is interacted with the training of defense. A prey bite is given to the dog at the end of each session, this will help the dog to release their stress, remember, s/he feels comfortable in prey and this allows him/her to relax from a stressful training session. A dog who is not mature must never be placed into defense, s/he is not capable of handling the stress and will go into full avoidance, once s/he learns that the easiest way out of a defensive position is to retreat, s/he will in all reality react in this manner for the rest of his/her life, at the very least it could take you months to recover back to that starting point.
A dog working out of prey drive is driven by an inner impulse to react to stimuli, and is controlled through his/her own emotions, it can be difficult to control a dog with a high prey drive, who is concentrating on his/her prey. Fight drive is controlled by the pack leader during the hunt with the pack.
The more you train your dog, in reality, is the more you are trying to make him/her understand, exactly what it is you want from them, such as taking your dog to a woods line, and encouraging him/her and releasing him/her to find the man, and s/he begins to learn through each training session that, “hey…there’s a man in there, lets do it”.
Training sessions are just trying to make him/her understand piece by piece, or session by session, to do a specific job for you. Until control is placed into the training sessions of the hunt, you cannot expect him to simply turn off his/her prey drive while chasing a man with a sleeve and simply return to you on a single command, it’s more difficult then that to acquire control from him/her, it is something that has to be practiced over and over, so, do not get excited, when through the encouragement of prey drive, you have to work harder to control him/her, you have encouraged through praise his/her great internal power, prey drive.
We know through our lessons, that dogs try to reach leadership and control of the Family; this is another internal desire within the dog, called rank drive, the more rank the dog, the more aggressive s/he will be to achieve his/her position, other dogs that have inherited less rank drive, aren’t as aggressive towards you, and are easier to control, and they will fall into the lesser position of the pack between you and your family, more easily. A dog that is referred to as Rank dog is an aggressive dog towards his handler. A dog with a high degree of Rank drive will always attempt to dominate you, s/he will resist by force, to him/her a command followed is a submissive act, and a show of weakness. Tracking drive, is the subconscious impulse to hunt by tracking of scent that has laid on the ground. Air scent drive is the subconscious impulse to hunt through airborne scent. A dog with a strong drive to hunt by air and has low tracking drive, is impossible to teach to track, s/he will always resort to putting his/her nose into the air to find their prey. I have attempted to train a dog with low tracking drive and the drive to hunt through air scent, nothing I ever did got him to track through land based scent. The Handler could find a suspect hiding in a car lot, or wooded area with this dog. The dog was by far better at locating an individual from a further distance then any of the other dogs in the class, but nothing I ever did got him to track from ground laden scent, he would always return to placing his nose into the air and finding him by airborne scent.
Play drive is the desire from the dog to play and make contact with the Handler; a dog who has no prey drive may still desire to play, where as prey drive is the desire to chase and capture prey. Play drive and prey drive are not exactly the same thing.
Patrick T. Merritt
(704) 279-1785
Patrol | Narcs | SRO
Back To Basics
After many weeks of hard work, and a few bouts of frustration, you have finally graduated the basic training canine class with your new Police Service Dog. You hit the streets running as a fine-tuned working canine team, performing at your “A” game, taking on each individual assignment with a newfound attitude of confidence. Weeks, and months pass by, and although you have directed your dogs’ in-service maintenance training to a higher level of tactical mind-set, you encounter situations where your dog begins to have less interest in complying with your first, or even second, verbal commands. Especially during those on-duty incidents or training scenarios when control is the number one basis for the success of the deployment.
For instance, you are dispatched to an alarm call at a local business after the first responding officer discovers an open door. You arrive at the scene and exit your cruiser with your Police Service Dog, tactically approaching the known entry point of the business while continually maintaining your cover advantage. After numerous verbal or physical attempts, your dog finally “Downs” to your command at the edge of the open door, and you begin to verbally announce your presence to anyone who may be hiding inside the premises. Following a number of announcements, you release your Police Service Dog into the building and s/he begins his search. You strategically trail your dog throughout the premises employing every tactical precaution available, just as you practiced in training. Your dog finally indicates the presence of human odor behind a closed door by exhibiting a behavioral change of verbal alerts and physically scratching at the door. You are excited and ready; this is what you have been training for. You call your Police Service Dog back to you in preparation of demanding that the suspect exit his place of hiding. However, your dog proceeds to ignore your directive and continues lingering at the door. Following numerous verbal commands, your dog hesitantly turns and advances toward your tactical location with obvious frustration. As soon as you gain control of your dog, you instruct the suspect to slowly step from behind the closed door with his hands visible. Next, you “Stay” your Police Service Dog and you tactically begin to approach the suspect in preparation of handcuffing, however your dog breaks your command and begins to slowly creep toward your location. This movement creates a distraction for you, likewise compelling you to direct your attention off of the suspect to verbally re-instruct and physically re-position your dog. You re-approach the suspect getting the handcuffs on one of his wrists. However, once again your Police Service Dog breaks his/her “Stay” position, but this time your dog makes unwarranted physical contact with the suspect.
Although hypothetical, this is only one of many scenarios that illustrate a very common problem that can develop through the result of training negligence, in both new and veteran canines alike, which can lead to civil liability, or worse, tragic consequences when it happens in real life. Let’s face it; it is no secret that if you situate a number of canine handlers together in one room the majority will not be afraid to speak of their successful canine missions, however you will soon discover that it is human nature that few will discuss their failures. Moreover, I have found that when canine maintenance training is concerned, the same mindset applies; many like to concentrate on areas of training that highlights their strong points and they avoid those areas that emphasize their weaknesses. All too many times, handlers forget about routinely reinforcing the fundamentals after they graduate from basic training and then they want to advance to working tactical. Yet, when the dog will not listen, the handler loses his temper and inappropriately overcorrects the animal, accomplishing nothing more than generating behavioral problems in the Police Service Dog. It is totally understandable that facing this setback head-on can sometimes become a frustrating state of affairs for any canine team; particularly when the handler is not entirely sure of the action to undertake to correct the dilemma.
However, if one takes the time to look at the big picture they will discover that the truth of the matter for rectification consists of nothing more than readdressing and consistently practicing the fundamental foundation of what canine training involves; basic, “Keep It Simple,” obedience. To clarify, let’s begin by defining the order of a “Pack Leader,” which is the generally recognized phrase that describes the relationship between the handler and his Police Service Dog. This position involves a two-fold responsibility for the handler as a “Pack Leader.” On one hand, the “Pack Leader” should act quite social with the canine member, however on the other hand; the “Pack Leader” should exert dominance when a command or correction is necessary. In other words, the handler should act extremely friendly with his dog, just as a partner or equal, however when a command is given the dog should trust that it is required to respond immediately or die. Don’t misunderstand this philosophy, no one is advocating that a handler should put to death his Police Service Dog for disobedience, however you must be knowledgeable of the fact that this is the canines’ way of thinking in his/her own natural habitat. Keeping this in mind, once a dog understands a command it should be given only once. Failure to comply with the first request should result in the handler taking prompt and firm enforcement action to correct the inappropriate behavior. Additionally, when commands are given the handler should eliminate the tendency to give more than one command for the same action; likewise maintaining simplicity. For instance, handlers have a tendency to issue consecutive commands such as “Down-Stay” in their attempt to have their dog remain in a prone position.
Psychologically, a Police Service Dog understands clearly and concisely the desired behavior, merely with a “Down” command. “Down” means “Down” until the dog is commanded to display another behavior or released from control. Accordingly, disobedience to the command should not be followed by an array of repeated commands or a “No” or anything else but an immediate unpleasant enforcement of the command. For example, a Police Service Dog that understands the “Down” command and breaks his/her location as the handler walks away, should immediately receive an unpleasant enforcement back into the “Down” position without verbal communication. Consequently, the Police Service Dog understands unmistakably that “Down” means “Down.”
Keep in mind, there is no hidden secret or gimmick available to keeping your Police Service Dog under constant control. The only factor that is required is your desire to develop a habit of maintaining consistent and basic, “Keep It Simple,” obedience drills as a fundamental part of your training routine. By continuing this habit, your dog will behave appropriately, maintaining total reliability under all conditions, from that neighborhood canine demonstration to that criminal apprehension when stress is at its’ highest.
For more information contact:
MT Denny A. Kunkel
(260) 493-4427
Patrol | Narcs | SRO
Training Your Dog To Trail
Let us begin to explore the process of teaching a dog to follow the trail of a man with an open mind; and to realize that there are many theories as to how to train your dog. I would have to say that I have seen many different theories presented to Handlers over the years. Some are good and some were not good. If I were to summarize a short synopsis of training a dog. I would say, find the right dog, be patient and never lose your temper.
Tracking is one of the most difficult lesson to teach a new Handler. The process is really quite simple, but lengthy and must be done in Increments, so that the dog learns his basic lessons properly.
SCENT SURE DOG:
Through the process explained in this article, our end result is a dog that you can rely on to find an unknown trail in an open field and consistently follow it with confidence. Including a heads up indication when there is no trail available or when the dog has over shot a 90 degree turn. A scent sure dog can be cast along a roadway to locate or recover the trail of a suspect or lost child. I remember in my early days as a Police Officer, when we use to say things like, “Well, I am a City Police Officer, I don’t need to teach my dog to track in the woods”. And the County Officer would say, “Well, I am a County Officer, I don’t need to teach my dog to track in the City”. I did not understand that city or hard pavement tracking is the most difficult training. It is the last place the doge goes in his training. A dog must learn to trail in a straight line on grass before we go into turns.
I also begin training in areas where there are few distractions, such as, people or other animals. The dog will always want to investigate animals or people either by the odor on the ground or visual distractions of people, cars, etc. Noise is another distraction that you want to say away from when teaching the dog his first lessons. It’s hard to get a dog to follow a trail when he’s more interested in the distractions.
A few definitions are needed before we go too far into our training.
- TRACK – To follow a man footstep to footstep. According to ground Disturbance, along with individual odors absorbed by the ground.
- TRAILING – To follow a man according to scent that has fallen to the ground according to the wind conditions.
- NEGATIVE – A noticeable change in the dog when he has come off the trail.
- 1. Head comes up
- 2. Leash goes slack
- 3. Tail change, etc.
- QUARRY – Subject being hunted, prey.
There is a lot of difference between the two definitions of tracking and trailing. When a man walks over grass, he crushes it. Which in turn causes the blades of grass to secrete a liquid, which after a short time period causes an odor for the dog follow. Individual odors, such as, shoe polish and other human odors, are also absorbed by the ground from the man. The dog will be far more exact on following the footsteps of man, they will also be much slower.
A trailing dog follows skin particles (called Rafts), which fall off the man and into the air. They are continuous and too small to be seen by man. They actually come from the outer layer of skin called the Epidermis Skin Layer. It is the air current, which determines where these small particles of skin fall to the ground. If you have wind, the skin particles will land on the ground some distance away from the actual footsteps.
I will not go any deeper with scent in this tracking article. But I will say this, every Handler must understand the fundamentals of scent. If you have not been through a scent class, you will lose a lot of bad guys, because you did not understand signals or lack of signals from your dog, that you could learn in about a two hour scent class. When starting the first tracking lesson, I first acquire a proper fitting tracking harness. A tracking harness is important because it distributes the weight and pull across the dogs’ body and not his neck. The dog’s head and neck need to be free to move so he can sniff the ground freely to follow the trail or track. Think about it. If a 200 pound man has a line attached to the dogs’ neck, and the dog is using his neck to pull. The dog cannot sniff the ground. I recommend a good leather harness, nylon is OK. I DO NOT agree with tying the dog’s head down. My friends, this is not the way to go. You cannot force a dog to track. There are lessons the dog will not learn if his head is tied down. The process of training a dog to track begins with teaching him what great fun he can have. He should b rewarded at the end of the track. The dog’s head must be free to move up and down and side to side so that he can follow the scent.
MOTIVATORS:
This is a term that I use to increase the desire for the dog to trail and learn. It is a communicator that the dog understands. Not every dog will begin to trail for the scent of man. But most will follow the scent of food. I know this will probably blow the mind of a few people and the first thing they will say is, “I don’t want my dog to pick up food on the track”. But it is a good motivator and the food will be removed from the trail in a short time. Once he has learned to follow odor on the ground to get his reward. I have communicated to him to sniff the ground for scent, now I can simply replace the odor with human scent. When I use food, such as a hot dog, I am always careful to have the track layer (or Quarry), rub it onto his boot and not drop pieces of the hot dog onto the ground. I just want the odor. If you drop food pieces, the dog will sniff out and eat the food. We do not want that. We just want him to follow the odor to the man who will give him the piece of hot dog at the end of the track. In a few lessons, the hot dog is going to be taken out of the picture entirely. We have communicated to the dog, with the aid of food, what we wanted him to do.
The motivator is determined by the dog’s desire, or lack of understanding of what I wish him to do. In essence, what will it take to get him to work for me? A few things I call motivators are:
- Human Scent
- Food
- Ball
- Praise
- Bite at the end of track
TEMPER:
losing your temper at your dog will set you back weeks in your training. So, do not get upset. You want your lessons to be positive, positive, positive. My first lesson on tracking will be to find a field with grass anywhere from 3″ to 8″ in height. The Handler places the harness on the dog and holding the dog at close proximity to himself. The Quarry usually holds the ball and gets his attention by talking to him. Showing the dog the ball and walk backwards, laying a short track by dragging his feet over the grass. I usually go about 25 feet and lay the ball down, placing some grass over the ball, so the dog cannot see the ball until he’s almost on top of it. But it is important that the ball is somewhat visible or the dog may start to search for it by circling at the end of his first track, we do not want that. So do not make the track too difficult in the beginning.
Also, you want to be sure that the dog cannot see the ball from where he is or he will simply go straight to the ball without trailing. I like about 3 tracks per lesson and then quit. Remember not too hard and do not try to advance to difficult tracks too fast. I add about 10′ to 15′ at a time to be sure he understands each lesson before advancing to more difficult lessons. Always be sure to lay your track with the wind going away from your dog. Never train trailing or tracking into the wind. Your dog will learn that with his head up, he can smell the scent of his Quarry much easier than sniffing the ground.
Once he learns that he can air scent and find the man, it is almost impossible to get him to put his nose back onto the ground. Or at the very least, it will take a strong motivator on the ground to get him going again. So lets do it right the first time. Remember that terrain and height of grass is important. If you train in areas of high vegetation, the scent of the Quarry will be high on the vegetation. This will cause the dog to trail with a high nose. Use lower cut grass for the initial training. Never correct your dog with the leash while tracking. One day you will be in a wooded area and the leash will get wrapped around a tree. The dog will interpret this as a correction and he may come off the track and away goes the bad guy. So absolutely, NO line corrections. If you must correct your dog, simply command him to “Leave It”.
CASTING:
Sometime after the first few lessons of trailing. I will begin to have the Handler cast the dog a few feet away from the trail. I will do this to teach the dog to give a physical indicator that he has found the scent. This simply means that the Handler can tell when his dog has found the scent. You can see the dog pay attention to the outgoing trail. Again, once you start this, the Handler must know exactly where the beginning of the trail is. We usually kick a straight line for a foot or two into the grass. 1′ from the direction we cane and 1′ towards the new direction. This does two things, it is a physical marker for the Handler to see and second, it lays down a hot spot for the dog to sniff. It makes it easier for the dog. The Handler always casts his dog from left to right of the outgoing trail. Starting lessons with just a foot or two away from the trail and eventually working up to over twenty feet away from the trail. Casting your dog in this manner will cause the dog to be “Scent Sure”.
Think about it, if you always cast your dog in the same direction of the trail. What happens when the track is 20, 30 or 50 feet away from where you were told the trail started? When you cast your dog into a field, you tell him to “Track”. Most dogs are going to go strong in a straight line. They are going to look for a trail, if there isn’t one right there, he is going to find one. When I speak of the dog giving a negative. I simply mean that there is a noticeable change in the dog’s body movement. The problem is this, the Handler has never learned to read a negative. And just as important, the dog was never taught to give a negative. So the team goes a quarter mile and then all of a sudden the dog stops. Because there never was a trail.
He was just trying to please his Master and track or try to find a track. The Handler calls out on the radio, “Well, I had a track but lost it”. In reality, he was never on the track. Had he taught his dog to cast properly and give an indication, he could have easily found the trail.
WHY TRAIN THE CORNER:
The process of training the 90 degree turn is also a main lesson acquiring a scent sure dog. It is through the process of teaching the dog to make a 360 degree circle when he overshoots his turn or runs out of the odor so to speak, that causes him to go into the circling process looking for the odor. The Handler learns the body language of his dog when he overshoots a turn and is no longer following scent. Most dogs with time and practice will simply raise their head, the leash will go slack and the Handler begins to circle the dog slowly backwards until he has recovered the out going trail. When the dog sniffs the trail, his head goes down, the leash gets tight from the pull of the dog and away you go.
TRAINING THE CORNER:
I use a large field for the beginning of corner work. The Handler can see exactly where the trail is laid, and so can I. This ensures that the scent is on the ground. Remember grass no higher than 6″ to 8″. We want the dogs nose down.
We start with 30 degree angles, right or left, from the straight trail. The angled trail does not need to go far, maybe 20′ to 30′. Because on short trails, I will usually leave a ball at the end of the trail. Have the Quarry lay the trail and then return by walking back the incoming trail. A man would be easily seen in the field by the dog and he will go to him by sight versus using his nose to trail. When the dog proficiently makes the angled turn, then increase to a 45 degree turn. I use flags to mark the corners, the Handler must know where each corner is. As the dog follows the straight trail, he may pass the corner, he is allowed to go past the corner but the Handler will not. He will stop on the corner and begin to recast the dog in a circling effect over the corner. When the dog passes over the turn, he should go with the trail. Be sure to give him a short praise for making the turn. Sometimes the initial circling is not pretty and the Handler will have to guide the dog in a circle because the dog has never circled and does not know what you expect. This corner work takes time, the dog does not learn this quickly. I have taken weeks to get a dog proficient at corner work.
REMOVING THE KNOWN TRAIL FROM HANDLER SIGHT:
I usually do corner work with a box type trail. Making 2 or 3, 90 degree turns. With each leg of the track 50′ or so. You can arrange the box with left or right turns. It does not always have to be a square. The Handler must be confident in his dog prior to removing the flags out of the corners. Then I will make him attempt only 1 unknown corner per trail. So out of 3 turns, only 1 turn will not be marked. Usually the first turn is not marked. This gives the Handler time to get comfortable with reading his dog. As the team gets proficient, you can remove flags off the corners and increase the distance of each leg of the trail before adding turns.
GOING HOME IN TRAINING:
I have a saying in training, always return home with the dog in training. This simply means that if there is a little frustration from corner work, go back and lay some simple straight leg trails for the team. Just as a team starts into advanced tracking, I will occasionally go back into the field and lay some box tracks for them. They are proficient at this and it’s on a good surface. It reinforces their training and its fun for them. So keep the fun in training.
LINE HANDLING:
I use a 10′ leash in training, its not too long. The Handler doesn’t get wrapped up in it and it puts a little distance between him and the dog. The Handler must keep the distance of the leash between him and the dog. If he gets too close to the dog, it can cause him to get a little nervous and the dog may prematurely speed up. Kind of like, you run and I run a little faster game between the dog and Handler. The Handler has a tendency to go left or right of the dog and can unknowingly guide his dog off the trail. The Handler must align the dog’s tail to the center of his body and stay there. If the dog goes left or right, then the Handler adjusts his position, keeping the dog’s tail aligned to the center of his body.
It is important that the Handler not drag the dog too hard. This is a nervous tension by the Handler to do this, he must allow the dog to move freely from left to right to stay with the scent. As time goes on the dog will get better and better at working the scent. Too many times we have outsmarted ourselves by trying to restrict the dog’s movement. We have done this because we were afraid our dogs would lose the scent in training, this is a nervous reaction by the Handler. In reality we have short changed our dog’s training because we did not allow him to make mistakes.
If a dog comes off the trail, then help him get back onto it and praise him when he does. If the dog consistently loses the trail, then back up your training to shorter, straight track. Remember one step at a time. You want the dog to learn each step completely before going on to the next.
TALKING:
Do not talk too much, this is a distraction to the dog. He cannot listen to you and concentrate on following a trail. I recommend a “Good Boy” when he casts off on the trail or after making a turn, but otherwise I am quiet. Eventually as time goes on, I will expose the dog to longer trails with a combination of turns in the trail. I will set the trails to different types of terrain, such as hills, creeks, etc. The dog still has to learn all these types of areas that he is going to work in.
This is the beginning of teaching your dog to trail. There is advanced trailing that I will not go into in this article. If you have any questions, feel free to call me and I will be glad to help you.
Patrick T. Merritt, Vice-President
American Police Canine Association
The Need for “Conflict Training”
The concept of “conflict training” is something that typically is neglected or forgotten in police K-9 training. I am asked for advice allot by handlers about problems they are having with their dogs. These questions range from,” My dog won’t bite a passive person”, or ” My dog works great in training but when I go to use him/her for real they won’t work and/or shut down”. The range of complaints/questions can be quite lengthy, and certainly we have all heard one or another over the years.
Recently I was teaching at a couple national seminars and saw the same issues arise with many teams, from across the country. These problems are not confined to any one training group, organization, breed of dog or even one training method. They can arise across the board, regardless of age, experience, training philosophy, or even type of dogs.
The term “Conflict Training” in simple definition means- Constantly Changing Certain Aspects of Training as to not to Pattern the Dog into an Incorrect Response. This is pretty self explanatory, but let me explain a little of why this is important and how we keep it from developing into a problem. We are all guilty of meeting in regular training groups. Once we are done” discussing” many issues we get around to training. Typically this happens on the same day of the week, many times the same location each time, and the same time of day, along with the same handlers and their dogs. This leads the dog to know it is training and this is a fun time normally with the handler, and not the same people and stress level you typically run into on the street.
Along with this here is a list of just some of the things that lead to patterning the dogs into a training mode, and things we should constantly change to keep it from happening:
2)Training with same handler’s and dogs each time
3)Developing a routine at training of doing the same things in the same way each time you train.
4)Training at the same time of day each week
5)Never training in adverse weather conditions
6)Never training in uniform you wear on the street
7)Never changing decoy’s to have unknown people constantly as bad guys
8)Never training at the times of day you actually work, like midnight’s for example
9)Too much or too little hidden sleeve, exposed sleeve, muzzle work, or suite work.
10) Never training for the issues you encounter
11) Never changing detection hides, amounts, and training scenarios or running blind hides, or conflict items such as food, tape etc
12) Not training on passive decoys, passive bites
13) Not training in real gunfire situations, environments, passive bites in total dark settings
14) Not progressing your dog in difficulty of task, be it tracking, detector work etc
The list is endless really but I will share some examples I have encountered.
“My dog won’t bite a passive person”- This is a very common situation today, and shared by most new teams especially. You have to remember first that most dogs today are very young when they hit the street. This complicates the situation, as most of their life so far all bite work has been done in a “prey drive” mode, not a defensive or civil type mode. The idea of going passive to avoid being bit came from our prison system, and their encounter’s with our dogs or the institutions dogs and learning they wouldn’t engage many times if they went passive. The word spread and soon we started encountering it often on the street. So what do we do to counter this problem?
The solution to this type problem is 2 fold. You must practice in many different settings, with many different decoys (experienced ones), with hidden sleeve, exposed sleeve, and bite suite as well as muzzle. The dog must be set up to win no matter what and you work your way progressively by steps through the problem. This means enough movement by the decoy to get the dog to engage and gradually fade out that movement to none. It, like many problems normally is not solved in one day or one session or maybe even one month. All problems take time, and consistency to overcome. There are no short cuts when it comes to problem solving. You have to train as you work. This means, in aggression work, you have to work with live fire once in awhile, work with the swat team, work with other dog teams, work in different weather conditions and again the list of combinations is endless. Most all problems can be traced back to training issues or patterning of the behavior by the handler.
Conflict Training (Scenarios) Are Infinite! Only Thing Constant is the Trained Response!
Train Hard, Stay Safe
Al Gill
Master Trainer
The Remote Training Collar Controversy
Regardless if one is on the canine training field or present during the instructional debriefing, the subject of remote collar (e-collar) training persistently emerges with the end result typically leading to unproductive debate. Arguments presented by countless collar adversaries such as “is there a necessity of shocking a canine into compliance” or “the handler surely lacks control when the collar is immobilized” is a clear case in point of the on-going misunderstanding of the application and desired results of electrical stimulation training. I for one will agree that the use of early limited level collars is cruel and limits the trainer to solely compulsion training. Early production collars restricted the trainer to employing negative based enforcement to establish dominance by using high levels of electricity to form the behavior of the animal, notably in the area of control work. In this circumstance the trainer would shock the canine for several seconds or until the animal complied with the command. Under this method a genetically soft dog (perceives pain and/or stress more intensely than average dogs) that was “jolted” too many times would reach crisis point and become anxious for fear of doing something wrong, or he would react to corrections with panic and loose focus on the task at hand. Unfortunately, this was the historical practice that has currently encouraged the controversy and poor media that has followed the present remote training collar system. If this is the type of e-collar training that challengers are referring to within their arguments, then they are correct to condemn the use of this system.
However, the contemporary e-collar models available today have advanced tremendously, not only in size and stimulation level capabilities, but also distance of range. For instance, models that are currently available on the market utilize 18-varied stimulation levels at the transmitter and have the capability to transmit up to a one-mile line of sight range. This technology allows for the opportunity of accomplishing more than one objective during a single training exercise. For example, when the remote training collar is correctly utilized the focus of training can be directed toward the properly selected dog’s instinctual skills on a positive level rather than on a negative level of continuous compulsion techniques. Moreover, through the repetitive practice of correct timing of low-level stimulation during remote collar training, conflict between the dog and handler can be eliminated via the canine recognizing the correlation between its own performance of the command and the end of the mild discomfort. In general terms, the dog associates perfectly timed corrections with his own performance, rather than thinking the trainer “got me.” Therefore, the canine’s attitude stays confident because he believes he can avoid the correction through his own actions; validating the mind-set of “Master’s of Association.” Overall, canines distinguish only pleasure or pain in life, possessing no principled values or the ability to think logically. Accordingly, training and development must be approached cautiously to prevent any undesirable associations, especially with the canine’s knowledge being acquired specifically through good and bad memory experiences. Even though, the highest level of “reliability” in a police service dog is obtained through compulsion training techniques, the highest level of “achievement” is accomplished through continuous coercion practices.
Don’t misunderstand, I am not saying that this is the only suitable system or philosophy of training available for today’s working canine, nor am I condemning the use of proper compulsion corrections when needed. On the contrary, what I am offering is an alternative thinking principle on the usefulness of a technologically improved training tool, which when used humanely, will provide compliance motivated by physical or mental pleasure, in lieu of compliance motivated by invariable physical and mental pain. Which when both systems are collectively balanced, will lead to the ultimate goal of a Police Service Dog that equally maintains a high level of achievement and reliability.
Note: For more information about Remote E-Collar Training please point your browser to http://www.Dobbsdogs.com
SGT Denny Kunkel, APCA Master Trainer
Use of Prey Drive in Detector Work
Much has been said about what is needed drive wise to be an effective Detection Dog. Some argue that prey drive in a dog has nothing to do with detection work, or can be a distraction in the work. But the reality is many times a dog whose play drive is average or below, but is a high prey drive dog; can be trained to be an effective working detector dog.
First let’s talk about the play drive methodology for training detector work. For years we all looked for dogs that naturally had or had been taught crazy playing with a ball or tug or to scratch for them. We all many years ago believed without these things it wasn’t possible to teach the dog to be a detector dog.
Over the years I like others had seen dogs which were super high prey drive dogs or to put it simpler, what we felt would be very good patrol dogs. These dogs maybe didn’t show much playing so we immediately ruled them out for detector dogs even if they showed high prey drive we said they had to be patrol only dogs. 20+ years ago cross training or dual purpose type training was extremely rare. So we looked for the specific areas we needed for that discipline, not being aware of the potential we were missing many times. One main reason is back in that era, we simply didn’t have access to the type of dogs needed to do cross training. Then came imported dogs and we soon realized it only made sense to use the dog to its’ full ability.
We first trained all our dogs to scratch and we believed this was the only way to pinpoint or source or target odor. We all believed passive dogs were not nearly as accurate as aggressive indication dogs. We used the high ball drive to teach the dogs and most were taught to scratch on boards or Plexiglas for their toy. Then came the 4 box variable system and our thinking started to change.
The 4-box system was the main system used by the DOD for many years and even still today in most cases. Again this was a step forward but still play drive was the main requirement. Then the idea that maybe with super high prey drive dogs could be used if we could focus that drive toward detector work to our advantage. When you think about prey drive in basic terms it is nothing more than the dog’s basic instincts to chase, catch, and kill. So how do we use this natural drive/instinct of the dog for the work we want him/her to do.
We took this idea and the idea of the rabbit coming out of its’ hole of the ground and running away and we developed a training wall filled with holes, and shelves at each hole. The idea is to simulate that rabbit coming from its’ hole. We simply are using the reward object or play toy, in place of the rabbit. The dog still gets to chase, catch and kill the object. It also becomes the play toy between the two of you for doing the task requested of him/her. A training wall was developed – you will see it is nothing more than plywood walls, with a system of holes and shelf’s to hold the target odor. It can vary in size, shape, and design. The concept is what is important not necessarily the size.
With this design, we are teaching at least five basic things to the handler and dog at the same time. They are:
- Footwork- or speed of movement with the dog
- Blading or Blocking the dog so it can’t blow past us on a search
- Teaching the dog to go to source
- Search patterns for the dog and handler
- Leash control
I will touch on these five things briefly to explain their importance.
Footwork:
It is extremely important. No matter the type of detector work your doing, if you slow down, stop, or even go too fast, it can lead to false indications, because your dog will start keying off your movement. With the wall you can teach the idea of keeping your feet moving even if the dog stops/alerts/indicates your feet should continue moving through the time he/she is paid (given his reward object). You should always remember that all dogs work at different effective speeds. Some fast, some slow. You should always work at the effective speed of your dog, not the speed another handler may, or what someone may tell you. You must know your dog and their effective working speed.
Blading or Blocking
This teaches the handler to not allow the dog to blow past them and stay on task.
Leash control
Like footwork it is critical to not key the dog with the leash or unknowingly correct him/her by jerking them around with the leash. These can be accidental type corrections, but to the dog it is still a correction no matter how subtle and it can lead to problems, such as the dog walking odor, shutting down or others.
Search Pattern
The wall teaches the “Low to High” search method as well as detailing and directing the dog to work were you want him to work.
Going to Source
The wall is very good for teaching this, because the dog learns from the beginning the reward object always comes from source, or the hole which contains the target odor.
This last item is where Prey Drive comes into the picture. Because the dog thinks the toy is coming from the hole, in their mind it is like the rabbit coming from its’ hole. So the dog learns to stare at the source because at any moment it (the rabbit or toy) could come running out or even just stick it’s head out to look around ( we call this stimming the dog, short for stimulate the dog). In the beginning phase the dog is teased (stimmed) by another person with the toy to get the dog very excited and wanting to get at it. The handler praises the dog for this behavior and then the dog sees the toy or rabbit go into the hole, now all he/she has to do is find it and he will get it at least in his/her mind. The toy is kept alive by the movement waving and teasing, making noise (hitting the floor or wall with it). What we are doing is using the same concept as the beginning of bite work training. Prey comes alive, keeps the dogs interest and dog gets excited, bites the object (tug, rag, toy or rabbit)then the dog will be allowed to make prey or bite the rag, sleeve etc.( Payment for the desired behavior )
This process is repeated over and over with searches becoming longer and more difficult. Once the dog is methodically searching and locating then we can transfer the dog to building hides, car hides or locker hides. Keeping the same concept in mind in the beginning as you did in the beginning with the wall. A 2nd person teases the dog with its toy and makes the dog believe he is hiding the toy in the room, or on the car etc. The dog gets very excited and desires to find the toy. He/she then searches and locates the target odor and then indicates (sits downs etc.), then he makes prey (gets his reward object to play with etc). It is very important the handler have the high happy tone of voice, plays a lot with the dog when they find the odor, and gets down to their (the dogs) level and play. It has to be fun and they always have to win when playing, because if it becomes a correction or not fun, then from the dogs’ point of view why do it? Many handlers make this mistake, and forget the play, winning, and voice and how crucial they are to your success as a team.
It is also important that you not make the dog out the toy after playing or winning. We want to build that intensity and desire for it, so the last thing we want is a correction in the mix. Many of you do not like this part, because it is difficult to force the dog to release the toy. But it is important so that the dog feels it escaped and now wants more, then a correction scenario where he/she thinks they will get a hard correction if they don’t give it up. Soon they tend to realize if they don’t find it at all they won’t get corrected so why do it and they start walking odor then. It always has to be fun and exciting for the dog. It needs to be that chase, the hunt and desire. Without it your success will be limited.
In the beginning we will choke them off the toy with their collar, later on once the dog is trained and working well we will then start making him out the toy. At this point the desire has been entrenched and methods taught so we won’t or shouldn’t be at least, hurting ourselves this way.
The wall is a great training tool for detector work. Certainly not the only way, and doesn’t work for every dog but it is one of the best ideas that has come along in many years. Few have seen one, and most are amazed at the simplicity of the concept and they way it works. The proof is in the results, the quality of working dogs you can train is amazing.
MT Al Gill
Von Der Haus Gill German Shepherds
16863 Boundry Rd
Wapakoneta, OH 45895-8058
(419) 568-9400
Narcotics Detection Training
An Informational Resource to Narcotics Detection Training
Core Components For Successful Detection Teams
This article will identify and address a few of the core components, which are essential in producing successful narcotics detection teams. Understanding and applying this information will assist a detection team in achieving and maintaining a high level of working proficiency as a result of the sound basic fundamentals the team has acquired through training.
Successful Teams Start With the Brass
Often not considered but vital to the success or failure of the team is that of administrative support. It is essential that the team receive support from the top echelon of the department to be effective as a unit. This includes educational, motivational, and operating budget support. This support should extend down to the shift supervisor level for which the team may be assigned under. Law enforcement administrations implementing canine programs should understand that canine units cost money and time to achieve the desired results. Teams that are given opportunities to attend training seminars,workshops and specialized schools will gain immense knowledge and education which will assist in their performance and skills both in training and on the street.
The administration should also conduct periodic reviews of the unit in order to assess and evaluate the units’ performance, identify and take corrective action concerning problems encountered by a specific team. In addition written training records should be reviewed to determine the teams training activities, problems and corrective measures taken. Also important is a review of cases the team has been utilized and their adherence to departmental canine standard operating procedures for any possible court challenges.
Selecting The Team
To set the record straight,great dogs by themselves do not make great teams. Great teams consist of the dog and its handler working together in tandem towards a common objective. Law enforcement has available many resources from which to acquire high caliber canines capable of meeting the requirements and demands for a narcotics detection role. The problem most overlooked is not with canine selection, but lies with handler selection. A poorly selected handler, who does not possess the diverse criteria required of a law enforcement canine officer can and often do destroy the working abilities and potentials of these high caliber police service dogs.
The process of selecting the most qualified officer as a canine handler should be one, which assesses and scrutinizes many criteria in which the candidate should possess. These criteria should include the officers’ experience on the street; considered as a “team player”, and not the “Lone Ranger”, does not possess a consistent history of disciplinary action, report writing skills, a desire and commitment to accept all responsibilities required by the jobs description, openness to constructive criticism and new ideas, and has family support (if married), for the time demands the position requires.
Adherence To Training Schedules
To diminish departmental liability it is essential that departments adhere to ongoing maintenance training by the canine unit. Federal statutes are in effect, which allow civil action to be initiated against those agencies that fail to comply with these acts. “Liability for Failure to Train” falls under the Federal Civil Rights Statute, Title 42 U.S. Code Section 1983. Departments, which maintain and utilize their departmental canine units, who fail to train, fail to provide and or maintain written documentation of a units’ training fall subject under this statute. It is imperative that canine units continue to conduct ongoing maintenance training and complete written documentation of all training activities conducted.
Common Handler Mistakes
More often than not, many of the problems arising with detection teams are due to handler mistakes and not of those by the canine. But unfortunately, it is the canine that gets the blame for these frustrating problems the handler begins to experience both on the street and during training. To avoid writing a novel on this specific subject, I will address a few of common mistakes which handlers fall into and have no clue why the problems they are encountering continue.
- Training areas for the specific type of training which will be conducted is very important. At times many handlers return to the same location time after time to conduct their training. The downfall of this is that it begins to “Condition” the canine to that specific training location. The canine excels as it begins to recall each area it has searched and looks like a robot. The problem lies in real life situations when a search is conducted in a different structure for example and all it has ever trained for is a mobile home or a hotel room. The canine, new to this environment, is confused and may not display the intensity or drive in its’ searching. It is important to expose your canine to as many training locations as possible to reduce conditioning.
- A second area is the training standards being utilized for training. It is important that outdated material be destroyed periodically. My personal opinion is that pseudo-narcotics substances not be used during training as it has been shown by composition to break down over a period of time. I prefer to use DEA issued controlled substances, which are rotated out for destruction on a periodic basis. It is also important that the amounts of which the team trains with during sessions vary and that the same individual is not the person hiding the training concealment’s, in which case the dog would begin to associate the individuals scent to the alert of a narcotics substance even when the odor of the narcotic was not present. It is also recommended that various types of containers composed of different composites be used for the training i.e. PVC, cloth, glass, tin, metal, cardboard, plastic, etc… Avoid at all costs using duct tape on a consistent basis to conceal hides to fixtures. Over time the canine will begin associating the smell of duct tape to narcotics even when the odor of narcotics is non-present. I have proven this time and time again to my students, who learned the hard lessons with this material. In addition, it is important that each training session have different set times prior to starting the training i.e. 20 minutes, 30 minutes, 10 minutes etc… Our goal is to train the canine to indicate on the desired narcotic odor and go to its source location regardless of the time the source of narcotic odor has been in position.
- The third handler mistake that I will address in this article pertains to distractions caused by the handler during the search. These distractions can and do effect the canines search. Some of these being handlers leash control, over presenting, blocking or crowding the canines search area, excessive talking to the canine during the search, the handler getting frustrated with the canine, looking at the canine, failure to maintain a good working pattern, failure to maintain a good working speed, poor reward techniques, not praising the dog enough on locating a concealment, placing hands near the reward during the search, not trusting the dogs alert, and inability to read the dogs changes of behavior. The list goes on but will be addressed in future articles. The important point is to avoid getting tunnel vision during the training process and keep a mental note of what are you doing and what is the canine doing or not doing which may be a direct cause and effect of your bad training habits.
The next issue of “Viewpoints” will address basic handler mechanics to which are designed to improve narcotics search performance. If you have any questions or comments concerning this article, please feel free to contact this author, Master Trainer Mike Johnson
Does Your K-9’s Alert Lack Confidence?
There is no doubt it is very amusing to watch an aggressive alert narcotic dog rip the dash out of a car, or to watch the paint chips fly off of a fifty thousand dollar vehicle to locate a stash. This is confidence. With the passive alert trained dog, there is little question in the handlers mind when his dog plants it’s tail end on the ground in an enthusiastic manner, and focuses on the location of the contraband, that they do this with confidence. This confidence passes on to the handler.
But, what if your aggressive alert is not so aggressive anymore or your passive dog no longer plants it on the ground with enthusiasm like he used to? Do you find you are questioning yourself? We are taught as a beginning handler to always “trust your dog”. But when the given alert lacks confidence, so do we. We start second guessing our dog’s ability, and this only compounds the problem.
When a narcotic dog is first trained on odor usually on a sent box, or scratch box, it does not progress past that point until it is giving a good indication, either by a proper set, or an aggressive scratch. This indication is aided by proper enthusiasm and voice inflection by the handler. Remember it’s just a game, and if you don’t continue to make it a game, you will start to see your dogs’ indication lacking confidence.
You have to stay focused so your dog can stay focused. How many times have you gotten your dog out of the squad car thinking about something other than the task of finding drugs? We have all heard the phrase, “your thoughts, and feelings run down the leash to the dog.” We would be naive to think that our dogs are receiving some kind of electric impulse running down the leash. Just like when we watch the involuntary body movements of a suspected drug courier while asking clarifying questions, your dog watches your every movement. When we get frustrated, or are doing something that we really may not want to be doing our body language changes and your dog picks up on these changes. Often this is a distraction for your dog.
This also holds true for training. If you are training your dog, and all you have on your mind is getting the training over with so you can get to something that you really want to be doing, your dog is picking this up through your body language, and/or negative voice inflections. You are distracting your dog. Make it a game, make it fun for you and your dog, and not only will you have a better training session, but the time will seem to go faster so you can get to whatever else you want to be doing.
So get those training boxes, or cans loaded and with as much focus, enthusiasm, and praise that you can muster and go back to the beginning, make it fun, and get that alert back to where it should be.
Douglas A. Daugherty
(812) 910-0735
Narcs | SRO
07/21/2007
Justifying the Cost of Imported Dogs
Most all of us can relate to the question asked most commonly at K-9 demonstrations, and that is why do you buy the dogs in Europe instead of buying dogs here in the USA? This question to people in the K-9 field is really an obvious one and probably doesn’t need any explanation. But to the layperson and even the typical breeder they don’t understand the differences in what is bred and what we need.
USA Today did a recent story about Congress attempting to pass a law to force the government to buy dogs solely in the USA or breed them on their own. They quoted breeders who claim they breed the same thing as the people in Europe and they sell their dogs for $1,000 to agencies not at the extreme prices of those from Europe. This again is a statement in and of itself. One group even made the comment: “what are they gold plated?” referring to the $4,000 price the government agencies have paid in the past for dogs. This is another typical statement by people who do not understand breeding and what is required of the working dogs we need. Let me explain some major differences in breeding in the USA and Europe as well as laws governing importing, demand and a few other things.
First let’s look at breed standards. In the USA there is no breed governing agency which controls the issue of registration papers for German Shepherds for example, and no group which demands soundness of the breeding adults. The major registering group or kennel club in the USA, registers about any breed imaginable, and openly admits they are not a breed society only a registry. They will issue papers on dogs from brother/sister, father/daughter/mother/son and anything else you can think of. So they do not control the money side of breeding in fact they encourage it. In Europe the SV (Verein fur Deutsche Shaferhun/German Shepherd Breed Club) requires a strict regimen of things before it will issue papers on a dog.
They include things such as:
- Working titles on bother parents ( i.e. BH title and Schutzhund 1,2,3,or IPO 1,2,3etc)
- Both parents are required to have an endurance title (ADtitle)
- Both parents must have certified elbows, hips, and DNA on file
- Both parents must have a show title
- Both parents must have a breed survey (Korum)
- A breed warden must visit the litter, and they must be tattooed by the SV, with an assigned number issued by the SV
Without these things and sometimes more you will never get registration papers on a litter or a dog. Thus the economic side is limited, unlike in the USA where breeding is done almost solely for money. Few people here will invest in solid imported breeding stock for their program because of costs or lack of actual breeding knowledge and they simply hold female after female out and use them for breeding, normally not even x-raying a dog or seldom a working title or even basic training. They are looked at solely as a means for making money. Yet they try calling themselves responsible breeders and people who claim to know what we need in a working dog.
The second issue is training. Again very few breeders in the USA will keep pups and train them to even green dog levels. They only want to sell puppies. Most of the time you find these people have never worked a dog, in police, Schutzhund, sport, or even basic obedience, and never trained a dog for anything. Yet they claim to know what they are doing breeding, but of course then you ask based on what knowledge are you basing your breeding decisions?
Normally the answer you hear is they are really good dogs and really smart, or I just wanted to breed them to pass on their genes because they are so smart. Those are not a valid reason to breed. There have been many very smart and good dogs that shouldn’t be bred for health reasons, temperament issues, nerve issues, drive etc. But unfortunately they do get bred as we all know. To breed and produce dogs like we need in the work field(s) in my opinion you have to either train dogs, work dogs, and/or invest the time to obtain help from an experienced breeder.
The next issue is guarantee on the dogs’ health or workability. Today agencies demand a guarantee on the dog so if it doesn’t perform develops health issues the seller will replace it. The person selling a dog for $1,000 here in the USA or even most breeders in the USA, are not going to have a replacement probably if it is needed. More than likely they won’t even be in business if a problem would arise. Most breeders here are doing it as a part time hobby, and they are here today and gone tomorrow. Unless they have a larger facility, and investment in dogs, and years of experience, odds are they won’t be around or have the money to refund any money to you if that situation would arise.
Training levels on young dogs. The hard facts are in the USA we do not have even close to the number of people who work with dogs like in Europe. So this makes it even harder to find a green dog in the USA with basic green dog training levels in them. Most of the breeders have no help or knowledge on how to actually do this work or the desire. So what you’re left with is a dog with very different levels of basic foundation work many times; if they have any at all. So you have to play catch up, if the dog has the ability, and then what is your time and agencies’ time worth to spend the time to get the dog to where it needs to be to start a basic K-9 class.
Along with this, I have always felt it is almost impossible for the lay person who has never worked a police dog, for example to understand what we need a dog to do and why. If you haven’t walked the walk it is hard to teach the walk and know what you’re doing. Reading books is fine, but it is no substitute for actual real life experience. Mistakes made in training of young dogs can leave a lasting impression that you as a handle for trainer may deal with the whole dogs career. Since 9/11 the demand has skyrocketed for dogs. Along with that, in the last 18 months to 2 years the US dollar has dropped in value against the Euro by extreme amounts. This drop alone has drove dogs up 60% in the last 18 months. Along with that shipping has gone up 40% in that same time period. Not to mention, fuel cost, food costs and so on.
To import dogs into the USA, as a commercial enterprise (anyone who sells dogs or livestock and makes money from it is considered a commercial enterprise) you must file a formal entry with US Customs when the plane wheels are up. So by the time it lands the entry has been applied for with Customs. Along with that you must have a customs bond (or post a $50,000 cash bond to cover amount of the bond). All of these things cost, especially when you throw in shipping, a shipping company, custom broker to handle the entry, and release fees. Many choose to go the illegal route and hide what they are doing, but any reputable breeder or importer won’t do these things, they should be operating by the book. Shipping today from Germany to Detroit as an example can run $700-775 per dog. From Germany to Canada it can run upwards of $1100-1200 US. These prices do not include any of the customs items I mentioned prior this is just the fee the airlines charge per dog. These are just a few of the things to consider when looking at costs of green dogs.
There are good breeders and trainers in the USA of course. Just beware of the issues I spoke about and make sure you know who you’re dealing with and what their experience is. Most knowledgeable trainers’ breeders will welcome you to come visit their facility, and meet the dogs. They are there if you have a question or problem. They train and breed dogs everyday not part time. They’re more interested in producing a good dog with solid all-around working abilities than they are of having their name out there as producing an agencies’ dog(s) or that agency buys from them. It should be about quality and integrity not egos and money. Check out their references. Lastly remember you normally get what you pay for and dogs are no exception.
Stay Safe,
MT Alvin E. Gill
(419) 568-9400
Patrol | Narcs | Explosives | SRO | Cadaver Detection
Heartworms
Heartworms are worms that live in the heart. They are carried by mosquitoes so any dog can get them, no matter if they live inside or outside. Heartworms are not spread directly from dog to dog, so if your neighbor’s dog has heartworms, he can’t directly infect your dog but the infected dog is serving as a source of infection. If a dog gets heartworms, they can betreated but since the worms live in the heart, they can cause permanent and irreversible heart damage thus affecting their ability to work and even shorten their life span. If a dog has heartworms and is not treated, he will eventually die due to the effect on the heart and on all the major organs,especially the liver. Signs of heartworm disease include tiring easily,coughing, weight loss, distended abdomen and a general lack of energy.If a dog doesn’t have heart worms, they can be placed on heartwormprevention to keep them from getting heartworms. If a dog is under 6months of age, they can start on heartworm prevention safely but if he isolder than 6 months of age, they need to have a blood test (called an occultheartworm test) before starting prevention. If he is negative (doesn’t haveheartworms) he can safely start on heartworm prevention. If a dog hasheartworms, he can be treated but since the worms actually live in the heart,even with treatment, they can still have permanent heart damage thusaffecting their quality of life and longevity.
There are several different forms of heartworm prevention that arecurrently available. The most common are the once a month chewabletablets such as Heartgard, TriHeart and Interceptor. There is also a once amonth heartworm preventative that controls fleas called Sentinel. I usuallydo not recommend use of Sentinel for working police K-9’s because most are exposed to multiple external parasites such as ticks, that Sentinel doesnot control. There is one topical medication, Revolution, that is labeled forheartworm prevention and flea control but I do not recommend its use inworking police dogs – anything topical can have its effectiveness decreasedwith exposure to moisture, including tracking in wet environments so I feelthat this is not a good choice for working K-9s. There is also an injectableheartworm preventative that is given every 6 months but I do notrecommend this medication. Most heartworm preventatives will also helpprotect the K-9’s from three common intestinal parasites – hookworms,roundworms and whipworms. It will not treat them for these intestinalparasites if they are infected with them but it will help prevent them frombeing infected.
Explosive Detection Dogs by Charles R. Kirchner, Master Trainer, A.P.C.A.
The increasing occurrences of terrorist activity bomb threats, extortion, and general criminal activity dealing with explosives have lead security personnel to reevaluate the role of trained explosive detection dogs. What was once thought of as a pure luxury is now quickly becoming a real necessity. Agencies who are to provide security for public buildings and airports find it imperative to employee the services of detection dogs. After testing all types of electronic devices, the best explosive detection system is a properly trained and motivated handler/dog team. Well trained dogs who display acute olfactory skills, accompanied with their human partner, make a valuable team. These teams can search more quickly, with a saving in man- power resources, and they have the ability to indicate areas not readily accessible to man. Once these dogs have been properly trained and introduced to every known explosive, they will search and indicate to their handler by a precise action (sit or down) the area in which the explosive is hidden. The training period may vary, but is usually about 10 weeks. This training demands the utmost care and patience, since the handler must learn to ?read? his dog`s actions. The speed with which these trained dogs work is remarkably fast as compared to that of a human search. The reliability is well in excess of 95% / this high reliability combined with its rapid rate of search make this an excellent choice in checking out bomb threats and clearing areas safe for dignitaries. The great risk and responsibility that is placed upon the handlers of explosive detection dogs cannot be overemphasized., as a major consideration in the training of detection teams. These dogs are called upon to search large buildings and areas where explosives are alleged to be hidden; they search room by room declaring each safe as they leave. Eventually, the entire area is declared safe – a tremendous responsibility as thousands of lives and millions of dollars of property are governed by the actions of these canine teams.
In an airport where trained explosive detection dog teams can be used to check luggage prior to it being loaded onto an aircraft, screening the inside as well as the outside of aircraft suspected of containing an explosive device and search areas traveled by VIP`s. Recent FAA figures show that trained explosive detection dog teams have been able to search and declare safe suspected areas with remarkable speed. The average aircraft can be completely searched in 16 minutes and vehicles are searched at an average of 9 minutes. This is calculated into a savings of hundreds of man-hours. Many foreign governments now have explosive detection dog teams assigned to Presidential security, much as we have here in the United States. Most agencies are now using Labrador Retrievers, Golden RetreiversRetrievers, German Shepherds and Belgian Malinois. For those departments who need their dog for both Police Patrol and Explosive Detection the overwhelming choice is the Belgian Malinois and the German Shepherd dog.
A good deal of research should go into the training of an explosive detection team. If a Police agency decides to employ the services of such a specialized dog, they should contract a professional, with a great deal of experience in the field. Any law enforcement agency who is about to make any inquiries regarding Explosive Detection Dogs and training, please feel free to contact the writer, Charles R. Kirchner / Canine Consultants Inc.
Conditioning And Its Effects
Conditioning And Its Effects – A Final Discussion
This article will continue in the discussion of the concept of conditioning and its effects, which can and do have an impact upon a working canine team. Conditioning training may produce either positive or adverse results for a team, which are linked directly to the conditioning methods being applied in a given training program. For the purpose of this article, conditioning will be addressed as to its importance for narcotics detection training, even though it spans across the entire spectrum in the training of the police service dog trained in other specialties. There is a common phrase used by many involved in the training of working canines, which is for the most part accurate. “Repetition builds Conditioning”.
In the realm of narcotics training this concept is important, however the manner and methods in which it is utilized are of more significance, which will either enhance or limit the teams working capabilities. With respect to the training of narcotics detection dog teams, repetition of a training method does not always imply that quality training will be the result. This is especially true if unknown flaws are being incorporated into the training process, whereby the use of repetition through conditioning will have an adverse affect, which will only create and compound problems for the team and its working capabilities. Conditioning is a process that occurs over time. It does not just happen overnight.
To implement positive conditioning, it is a process requiring a series of correct and precise increments. This is known as “Successive Approximation”. An example being, teaching a canine to search for high and deep concealment’s. The process must first begin by teaching and conditioning the canine to search low and shallow depths in the initial training. Upon properly conditioning the canine at this level, heights and depths may be increased gradually until the canine is actively searching and capable of detecting high and deeper placed concealment’s.
Conditioning Factors Considered in Narcotics Training
There are many conditioning factors in narcotics training to be considered and identified in order that a team progress in its training, while avoiding areas which could present problems for the team in a real life working environment.
The importance of numerous training locations and search types cannot be over emphasized in ongoing narcotics training. This applies to locations to include buildings, commercial and passenger vehicles, aircraft, boats, semi trailers, recreational vehicles, etc. Training in different physical environments exposes the team to a range of working problems in which they will be better prepared in their duties on the street. Teams which train in only one specific location or search type for narcotics training, for example, will in fact condition themselves to that working environment. Over a period of time, the team will perform like a robot as they have been conditioned to that location. The problem surfaces when the team is called to work in an environment that they have not trained for with similar characteristics. An example, being a team that trains only in hotel rooms and are called to search a large commercial building, warehouse or residence. The teams will not exhibit the same “robot search intensive execution” which they have been conditioned as a result of limiting themselves to only one training location. The same applies to locations of narcotic hides during the training session. It is important to challenge the team in locating new concealment areas during the training process. The team should gradually be conditioned towards increased levels of difficulty of concealment locations, to include heights and depths.
The team should be exposed to various types of container composites such as cloth, metal, plastic, glass, nylon, vinyl, wood, cardboard, leather, etc.. in which a narcotic hide could be concealed. Narcotic training bags are a great training tool, however, they should not be the only hide container used in narcotics training.
A second conditioning factor to be considered are the narcotics training standards being utilized during the training sessions. It is important to use varying amounts of the controlled substances being used as concealment’s in the training process. Concealment amounts should also include residual amounts. This is especially important as money forfeitures are considered. It is recognized that access to large pound and kilo amounts for narcotics training by canine units is often difficult to obtain. However, those units having opportunities to train with departments that maintain these quantities should take advantage of these types of training activities that will also assist in large volume conditioning training.
In regard to the training standards being utilized it is important that the departments inventory material be periodically rotated out to avoid training with dated material. During training sessions it is suggested that the use of varying set times of the training material being concealed be included into the training problem. In addition, the periodic use of masking agents and commercial products in the training process are highly recommended in enhancing the team’s ability to work through distraction odors in locating concealment’s.
In conclusion, conditioning is developed through repetitive action, which if performed properly teaches the canine to perform specific task functions. This process begins from the first day the canine is introduced to drug box training in detecting specific controlled substances and advances onto detailed search patterns exhibited by the canine during building searches, vehicle searches, etc. Conditioning must be viewed as an art by those involved in the training of narcotics dogs. Conditioning training performed properly is an invaluable training tool. Failure to understand and apply it correctly can lead to long-term problems for the narcotics detection team.
The next issue of “Viewpoints” will address basic handler mechanics to which are designed to improve narcotics search performance. If you have any questions or comments concerning this article, please feel free to contact this author, Master Trainer Mike Johnson
GASTRIC DILATATION & VOLVULUS – CANINE BLOAT
By Ann Yowell
Gastric dilatation and volvulus, commonly referred to as bloat, is a potentially fatal condition that is always an emergency and requires immediate medical care.
Gastric dilatation and volvulus (GDV) can be a two-part condition. In gastric dilatation, the stomach becomes distended with gas, fluids and possibly food. Instead of being its normal size, the stomach becomes grossly distended and tight like a drum. As the stomach swells, it may rotate 90 to 360 degrees, twisting between its fixed attachments at the esophagus (the tube that carries the food from the mouth to the stomach) and at the duodenum (the upper portion of the intestines where the stomach empties into the intestinal tract). This twisting of the stomach is volvulus. The twisted stomach traps air, food and water in the stomach. The enlarged, twisted stomach obstructs veins in the abdomen, leading to decreased blood pressure, shock and damage to the internal organs.
Causes and Prevention
Even though the exact cause of bloat in dogs is not known, there do seem to be several contributing factors. Possible causes and preventative measures include:
(STRESS)
This would include dog shows, whelping, boarding, changing routine, introducing a new pet in the household, work-related stress, etc. Stress is a known factor in bloating, especially when it is combined with a change in food or feeding schedule.
(HEREDITY)
Dogs who have untreated Exocrine Pancreatic Insufficiency (a medical condition in which the dog’s body doesn’t produce the necessary digestive enzymes) are more prone to bloat. Dogs whose parents or siblings have had bloat are also more prone to bloat.
(ACTIVITY)
Do not exercise or train for one to two hours (or longer) before and especially after eating. Just like us, dogs like to relax before and after they eat. A known cause of bloat is a dog eating a meal and then exercising. Always encourage your dog to lie around and NOT be active for at least two hours after eating.
(EATING HABITS & FEEDING ROUTINES)
Rapid eating can cause bloat – the faster a dog eats, the greater the incidence of bloat. If your dog eats their food too fast, try slowing him down. You could use a brake-fast bowl, which is designed to make him work around pillars in the bowl, thus slowing him down. You can also moisten his food prior to feeding him, especially if it is dry kibble. Feed a high-quality diet with adequate fiber and low fat. Do not elevate his food bowl. If you have to change his brand of food, do it gradually. Make meal times peaceful and stress free.
Make sure you feed your dog AT LEAST TWO MEALS PER DAY. This is something about which I often find myself arguing with law enforcement and military trainers and handlers. It is much better to feed two smaller meals per day than one large meal, as this is a major predisposing factor to bloat. Handlers often argue it is not practical to feed before they go to work based on the fact that we don’t recommend a large meal within two hours of activity. But if you feed your dog when you first get up, by the time you get ready for work, go to work, go through roll call and get on the street, two hours have probably passed. And even if it hasn’t, how many times do you immediately start working your dog once you get to work? So most of the time it will be several hours from the time your dog is fed until he actually has to work. Two meals per day are not only helpful in decreasing the chance of bloat, they are also better for the dog’s mental and physical well-being.
(TYPE OF DIET)
Dry kibble is probably the most popular type of diet provided to working dogs. It is the most economical, easiest to store and handle and is beneficial for their teeth. But it also expands once it is wet. Try the kibble test on the current kibble you are feeding – put a cup of kibble in a bowl and add a cup of water and leave it overnight. The next morning, you can see the amount of swelling the food will do in your dog’s stomach. If the brand of kibble you are feeding greatly expands, you should consider changing brands of food. I also advise wetting all kibble prior to feeding.
(FRESH WATER)
Provide access to fresh water at all times but don’t allow them to over-engorge on water before and after meals.
(ANATOMICAL BUILD AND PHYSICAL CHARACTERISTICS)
You can’t control the way your dog is built, but if he has a big, deep chest, you know he is more prone to bloat and can be more diligent with his care. Older dogs, males and dogs that are underweight also have a higher risk for developing bloat.
(TEMPERAMENT)
Nervous or easily stressed dogs are more prone to bloat but dogs with these temperaments don’t usually make it as working K-9s.
(BREED)
Some of the breeds that are prone to bloat include German Shepherd, Doberman Pinscher, Labrador Retriever, Bloodhound, Rottweiler, Weimaraner, Great Dane and Great Pyrenees Newfoundland, but bloat can occur in any large breed dog.
Signs of Bloat
From the onset of the first sign, there is very little time to get immediate medical attention for your dog. It is very important to know your dog and to be able to notice when he is not acting right. You need to know what is normal for your dog so you can easily recognize what is abnormal.
Typical signs include, but are not limited to, the following:
- Attempts to vomit – this is one of the most common signs seen and has been called the “hallmark sign”. The dog will attempt to vomit and is usually unsuccessful – either nothing comes up or possibly just foam and/or mucous is vomited.
- Doesn’t act like his normal self – for example, if your dog doesn’t usually ask to go outside during the night and asks to go out combined with frequent attempts to vomit, this can be a sign of bloat.
- Bloated, distended abdomen that feels very tight, like a drum.
- Heavy drooling and salivating.
- Very restless or anxious – this can include panting, pacing, whining, a wide-based stance, refusal to lie or sit down or the assumption of a praying position.
- Hunched-up position.
- Heavy or distressed panting.
- Increased heart rate, which continues to increase as the bloating progresses.
- Weak pulse.
- Weakness or collapse.
Treatment
GDV is a life-threatening medical emergency that can cause a horrible, painful death. At the first sign of bloat, you should immediately present your dog to a veterinarian for treatment and care. Even if you are not sure if it is bloat, it is better to be safe than sorry. Have your dog checked by a veterinarian if there are any concerns. DO NOT attempt to treat this yourself with the so-called “bloat-kit.” The time you waste trying to do this yourself is time wasted getting proper veterinary care for your dog and will probably mean the loss of the dog’s life.
When your dog is presented to a veterinarian, treatment will vary depending on the situation. If there is a dilatation only, we will attempt to pass a stomach tube to relieve the pressure. If this is successful, air and fluid will be removed from the stomach and your dog will have immediate relief. He will also be treated for dehydration, possible infection and any other medical problems that are of concern.
With a volvulus, the stomach is twisted and requires surgical intervention. During surgery, the stomach and spleen will be repositioned. Any tissue showing compromise because of lack of blood and oxygen may be removed. The stomach will be sutured to the abdominal wall (this is called a gastropexy) to decrease the chance of it twisting again. Gastropexy has been shown to be very successful in preventing future incidences of bloat. Even with surgical intervention, a dog that has suffered with a volvulus can still die. If the dog makes it through the surgery, he will still require extensive hospitalization, treatment and care.
GDV is a life-threatening emergency that can occur anytime. There is no way to completely prevent it but there are many things that can be done to help decrease the chance it will ever be a situation with which your dog will have to suffer.
Lieutenant Harvey L. Holt – A “K-9 Biography”

One of the newest members to the A.P.C.A. and a member of the Executive Board on the Board of Trustees is Lieutenant Harvey Holt of the Bloomfield Police Department. Harvey has been serving as a Deputy Town Marshall since July of 2007. Since being hired on, he has worked non-stop to try and bring a Narcotics Detection Canine team to the town. His persistence paid off, and in February of 2009, the Bloomfield Community raised enough money through donations to pay for their new K-9 officer “Dristan.” The team is currently certified with the A.P.C.A. Police Service Dog Title designation.
Prior to his employment with the Bloomfield Police Department, Lieutenant Holt served nine (9) years as a Security Forces Member in the United States Air Force. Through his hard work and dedication he promoted through the ranks quickly and obtained the rank of Technical Sergeant. In 2003 he was selected among his peers to specialize in the Military Working Dog Career Field. He jointly trained with members of the Army, Navy and Marine Corp at Lackland Air Force Base, Texas. Upon graduating from the Department of Defense Military Working Dog School he was top of his class and honored as the “Distinguished Graduate”.
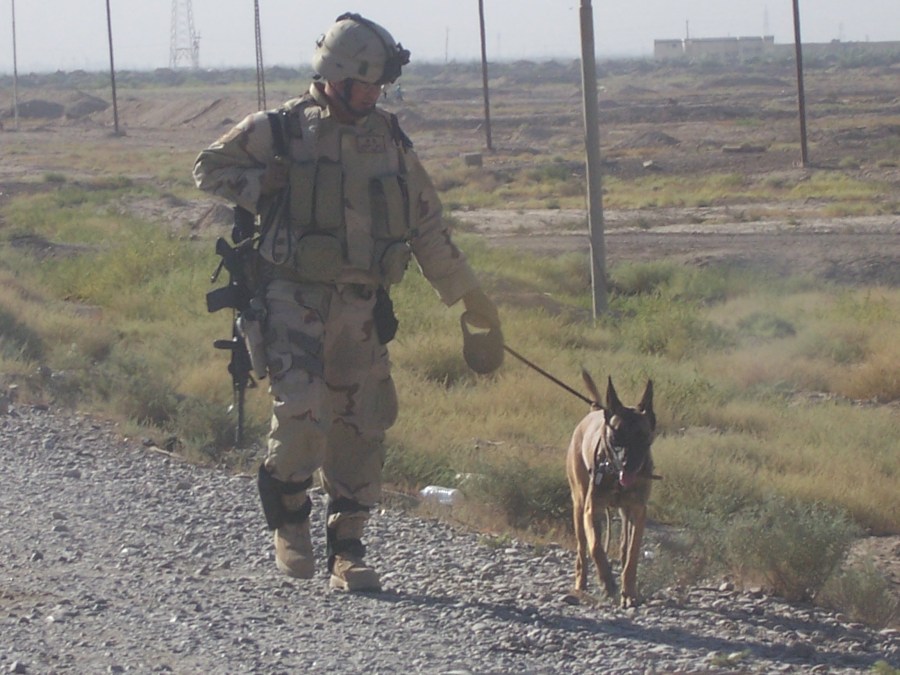
Harvey was then assigned to the Presidential K-9 Unit at Andrews Air Force Base, Maryland during the Presidential Administration of President George W. Bush. His primary duty as an Explosive Detector Dog Handler consisted of safeguarding the President of the United States and other World Leaders while they traveled around the world and through the Washington D.C. area. While assigned to Andrews Air Force Base, one of his daily duties was providing security for Air Force One and occasionally Marine One, the Presidents Helicopter. Harvey was chosen as night supervisor with responsibilities of overseeing K-9 team training at Andrews Air Force Base. Harvey was hand picked to assist the United States Secret Service on several missions to include the United Nations General Assembly #60 in New York City. This meeting was the largest assembly of World Leaders in history and was held on the five (5) year anniversary of the September 11th Terrorist Attacks.

While assigned to Andrews Air Force Base, Harvey volunteered to replace a handler for a deployment to Iraq. He then completed a combat dog handler skills course at the Desert Warfare Training Center, near Las Vegas, Nevada. There he graduated “Top Dog” among some of the best handlers in the Air Force. Harvey was then assigned to supplement the Army and served seven (7) months in Baqubah, Iraq.

While there he served as Kennel Master for three (3) separate Forward Operating Bases and directed daily combat missions for six (6) teams. Sergeant Holt and his Military Work Dog “Jackson” located several weapons cache’s and was able to locate several snipers that had members of his team pinned down. Sergeant Holt and his partner “Jackson’s” mission photo is currently on display in the Air Force Museum’s tribute to the Iraq/Afghanistan War at Wright Patterson Air Force Base in Dayton, Ohio. Harvey was awarded the U.S. Air Force Combat Action Badge and the U.S. Army Commendation Medal.

You must be logged in to post a comment.